Day: January 10, 2017

How to Install the Dead On Arms Trigger Guard


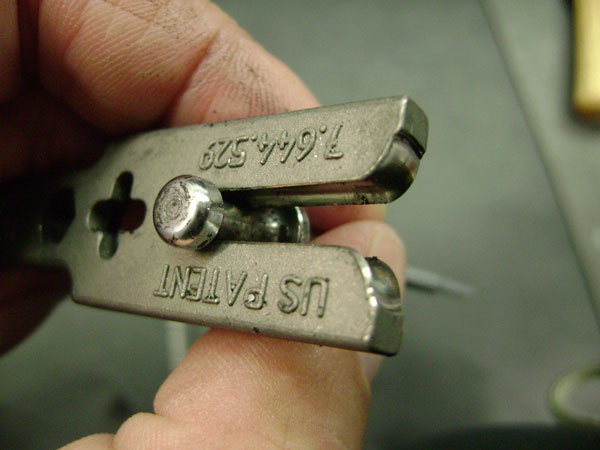
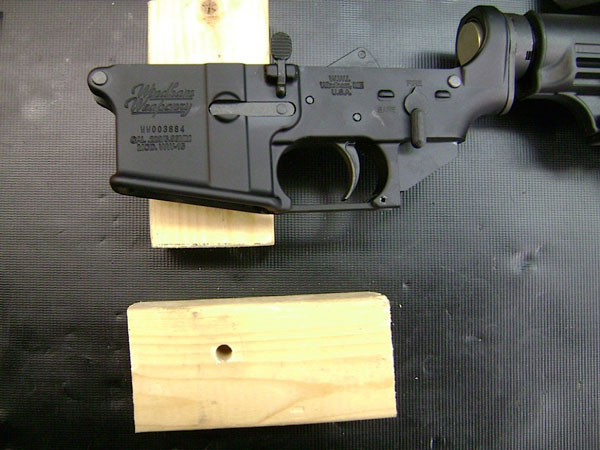
First make sure the rifle is unloaded. Then remove the lower from the upper by pushing out the takedown and pivot pins. Remove the pistol grip using a 3/16″ allen wrench. By removing the pistol grip it will allow you to make sure the trigger guard ear is able to flatly rest on the wooden block you will use to drive out the roll pin to avoid damage to the lower. When you remove the grip make sure not to lose the safety detent which is in the receiver under the safety, and the detent spring which is in a hole in the pistol grip.
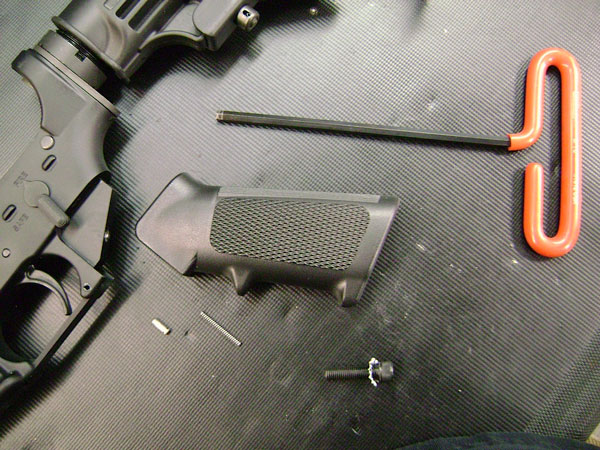

Cut two pieces of two by four and drill a hole in one.


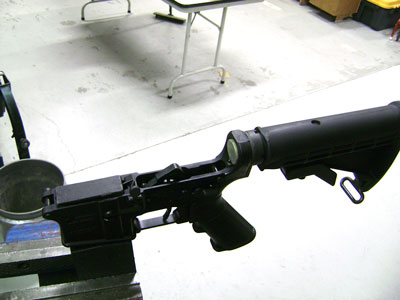
Rest lower on the blocks of wood and support the stock area with the pistol grip as shown.
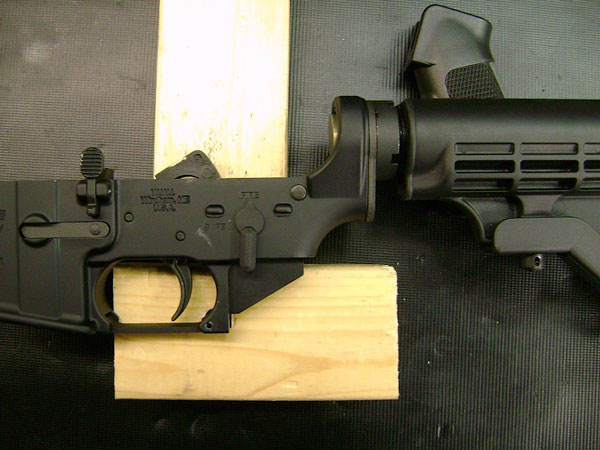

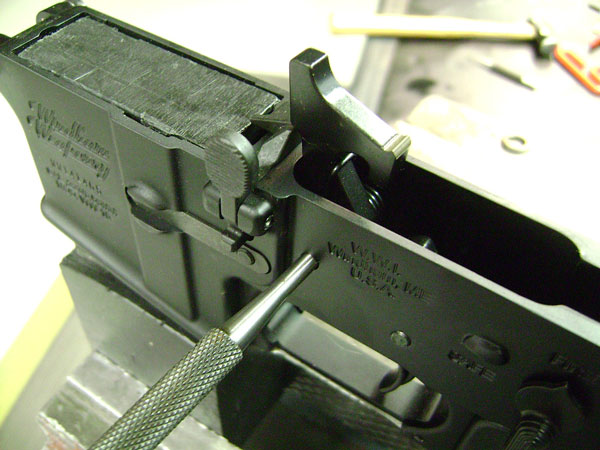
Slowly and carefully drive out the trigger guard roll pin with a 1/8″ roll pin punch into the hole in the block of wood.

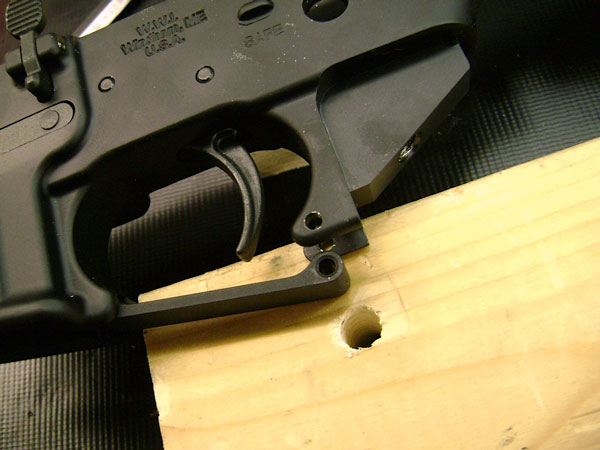

Press in the front trigger guard detent with the punch and remove the stock trigger guard.
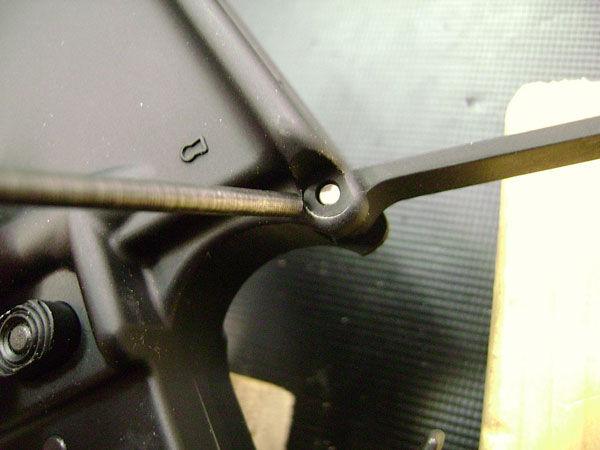


The DOA trigger guard should be orientated like this.
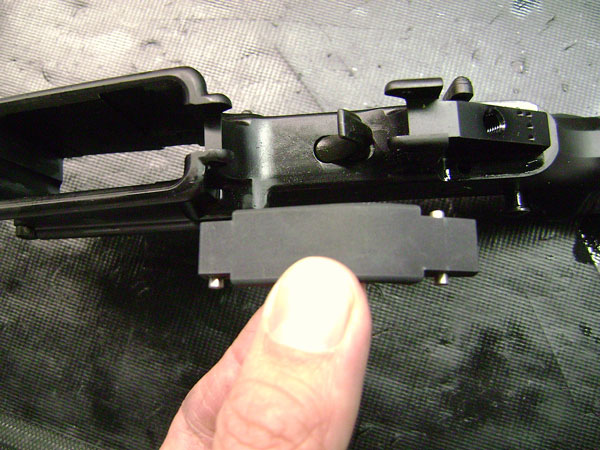

Press in the single detent on the front of the trigger guard and insert it into the front trigger guard ear.


Press in the two detents on the rear of the trigger guard and push them into the rear trigger guard ear until they click into the two holes.
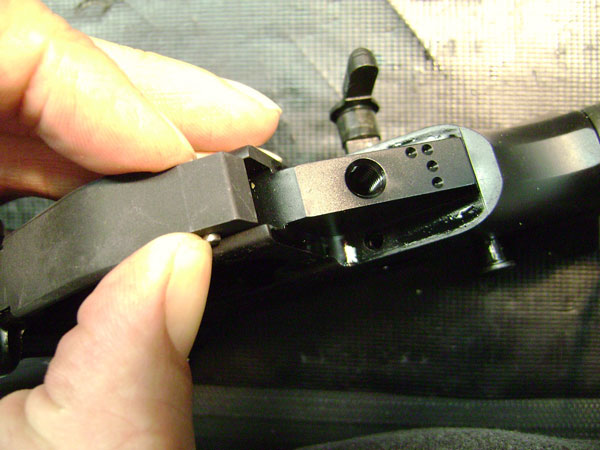
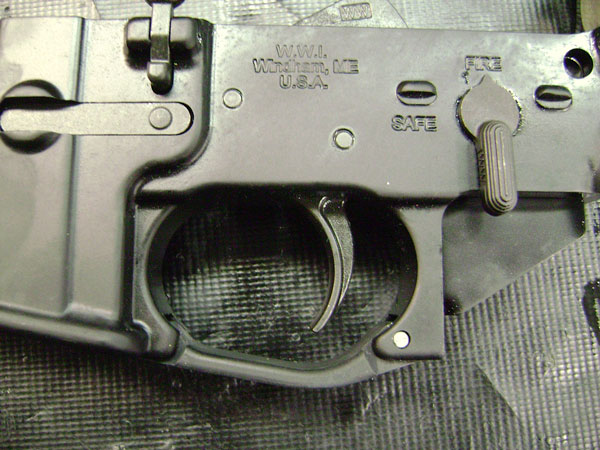

Reinstall pistol grip being sure that the detent for the safety is back in the hole in the receiver, and the detent spring is back in the hole in the pistol grip and up against the detent.
Click here to buy the DOA Trigger Guard

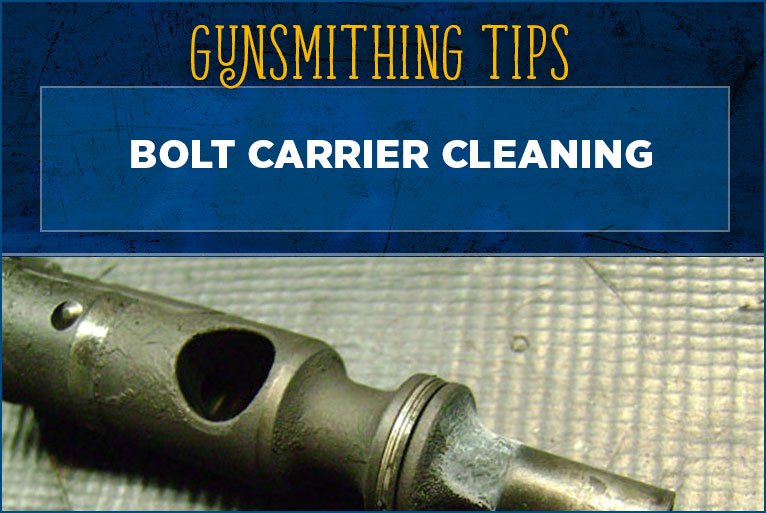
Bolt Carrier Cleaning

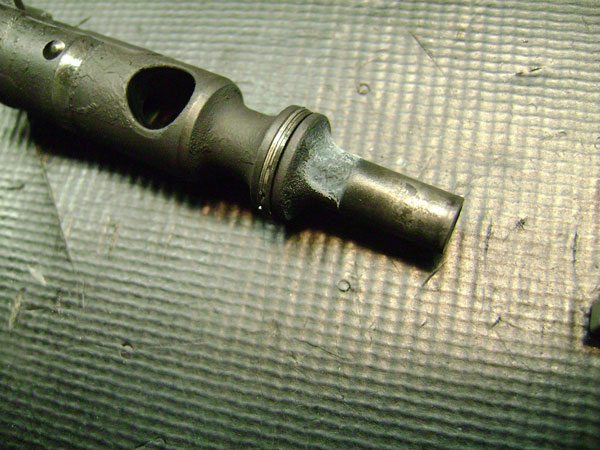
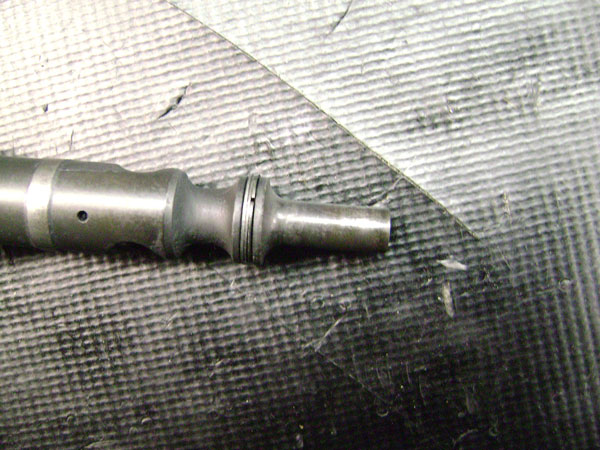
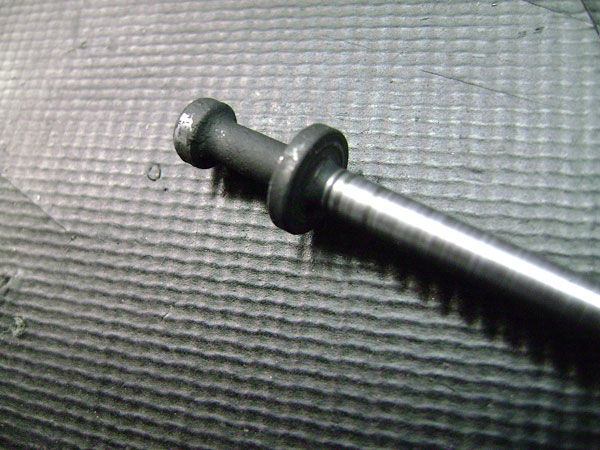
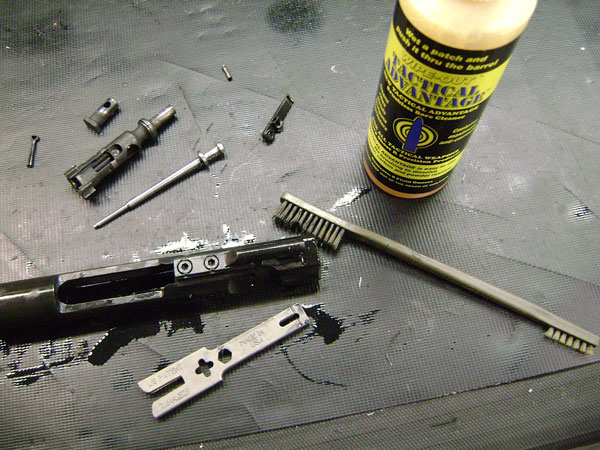
These photos show a rather extreme example of a dirty carrier which hasn’t been cleaned in about 5000 rounds.

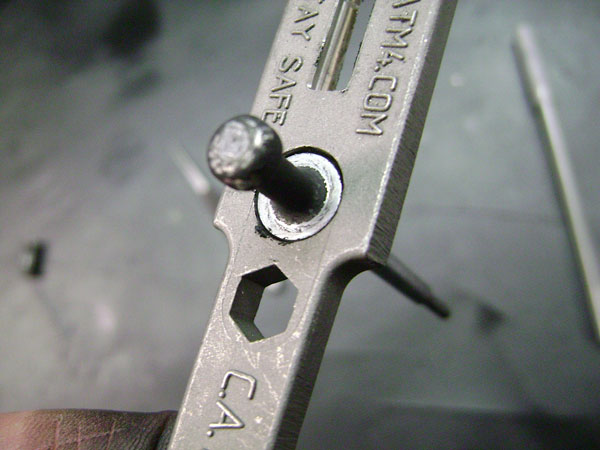
For cleaning a carrier I like the Carbon Scraper Tool and Wipe Out Tactical Advantage Cleaner (see links below to purchase). Here I just simply applied the Tactical Advantage and used a toothbrush. You can also soak the carrier in this solvent to make carbon removal even easier as it won’t harm the chrome lining. Any places you can’t reach with the Carbon Scraper Tool, you can use a razor blade to carefully remove thick carbon deposits. But if you don’t go 1000 rounds or more without cleaning your carrier you won’t have this much carbon to scrape off. Also note that you can use the part of the scraper used for the bolt tail to clean carbon from the retaining pin area of the firing pin.


Clean and ready to roll!
AR15/M16 Bolt & Carrier Carbon Scraper
Wipe-Out Tactical Advantage Bore Cleaner

Installing Telestock Endplate with Quick Detach Socket and QD Swivel


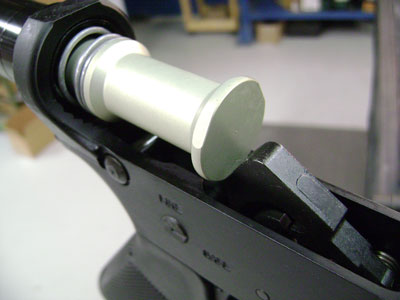
First verify that rifle is empty, and then push out the pivot pin and takedown pin and remove lower receiver from upper receiver. Push buffer detent in and remove buffer and spring and set aside.

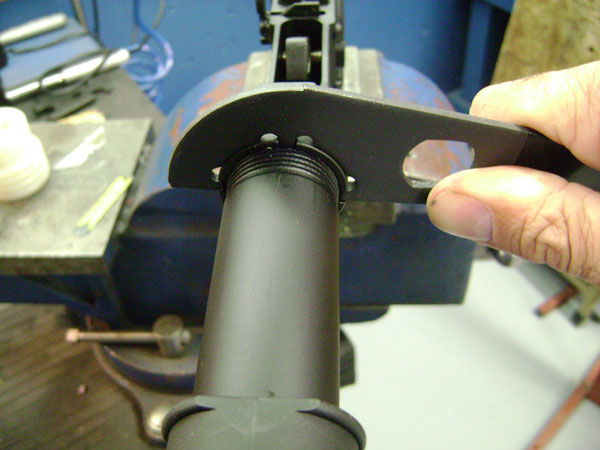
With the lower on an AR15 lower receiver vise block, loosen stock castle nut with a tele stock wrench.


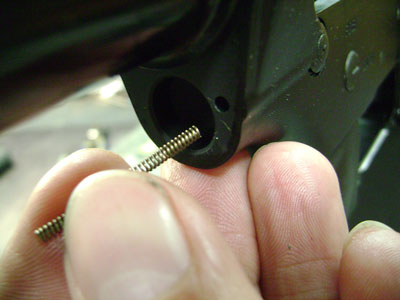
Screw the castle nut all the way back and pull the end plate back exposing the takedown pin spring and pull the takedown spring out and set aside.


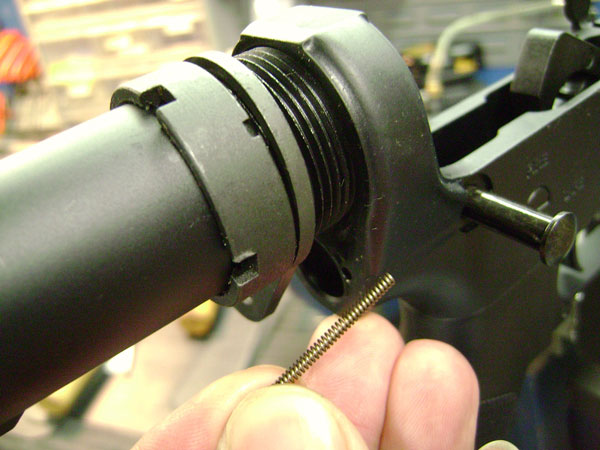
Hold your thumb over the buffer retainer and unscrew the buffer tube. Once it is backed off of the buffer retainer slowly release the buffer retainer but leave it in the lower.


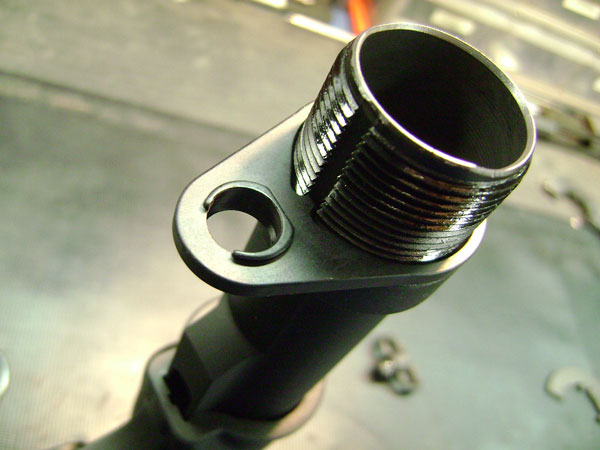
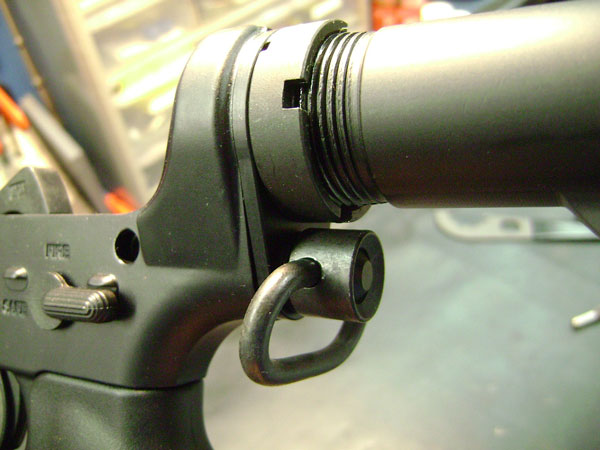
Remove stock and remove the stock endplate and install the QD endplate so it looks like this.


Screw buffer tube back onto rifle all the way in until it comes up to the buffer retainer. Then press the buffer retainer back in and screw the stock around until it goes over the shoulder of the retainer enough to hold it in the rifle but not so far that the retainer binds against the tube.

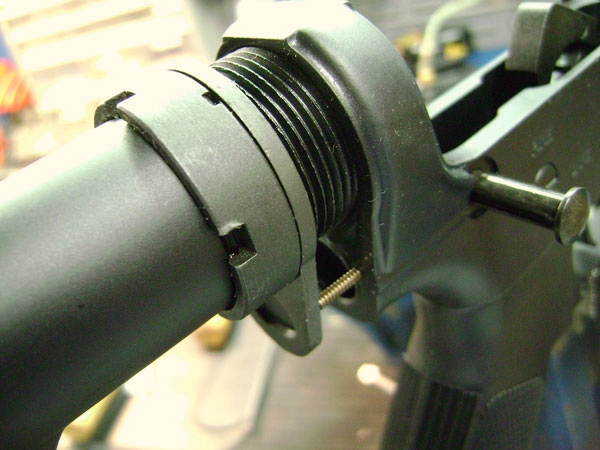
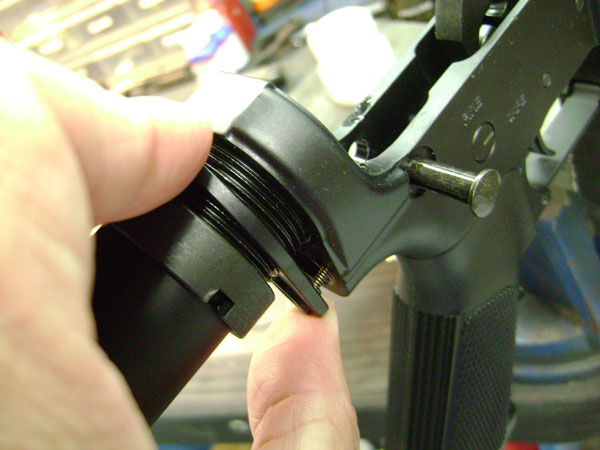
Now put the takedown pin spring back in its hole in the receiver and carefully push the QD endplate up to the receiver. Compress the spring into the receiver without bending it over and screw the castle nut up to the back of the endplate.


Make sure the stock is straight and tighten the castle nut up against the endplate.


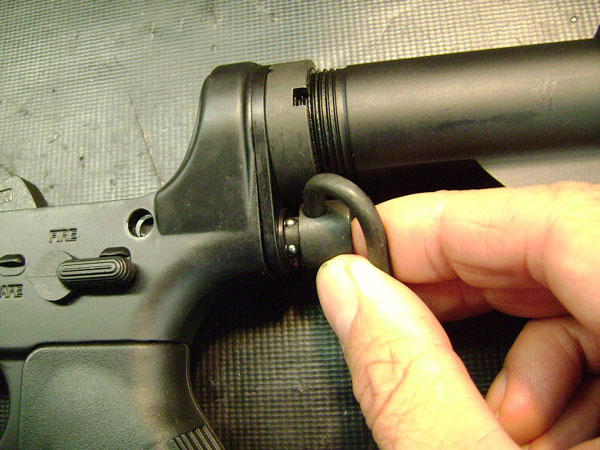
Press the button on the back of the QD swivel and insert it into the socket in the endplate.


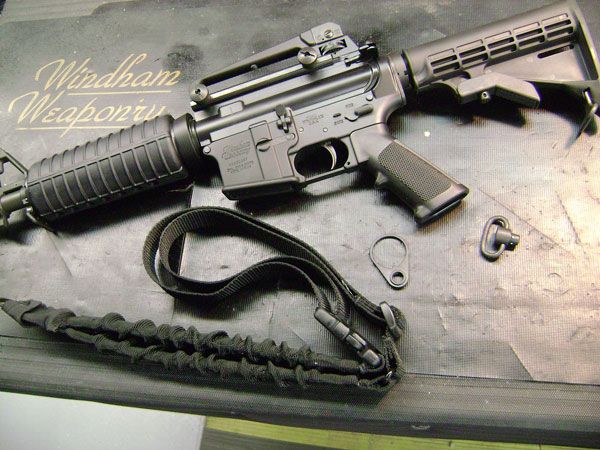
Now you are ready to mount your single point sling to the swivel.


Here are links on the Windham Weaponry website to the various parts described in this article:
Q.D. Endplate
Q.D. Sling Swivel
Blackhawk 1 Point Storm Sling for AR15 / AR16

Removing a Blown Primer From Your Lower

This isn’t a terribly common occurrence but it does happen from time to time. All of a sudden for no apparent reason you can’t pull the trigger or move the safety on your AR15. The hammer is stuck in the cocked position and will not move no matter how hard you try to pull the trigger.


Nine times out of ten this is because a primer blew out of a case as it was fired and fell into the lower. The primer rolls under the trigger and jams underneath the back of the trigger. If this happens clear the rifle and remove the lower from the upper receiver by pushing out the takedown and pivot pins.

First try shaking the lower upside down while trying to move the hammer, trigger and safety. Sometimes you can jar the blown primer loose and shake it out of the lower. If this doesn’t work than it is a fairly simple matter of removing the hammer and the trigger and removing the blown primer.

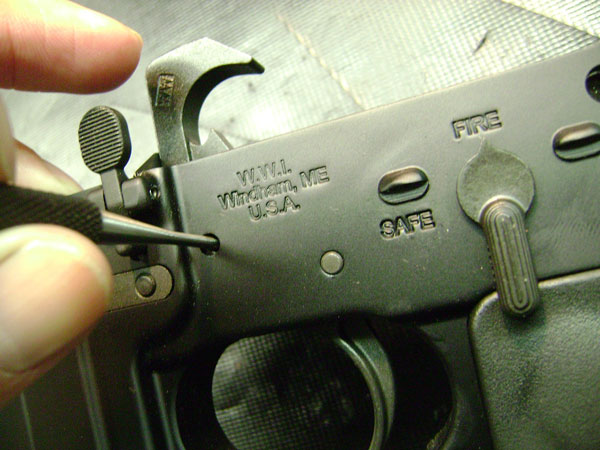
First look into the lower and note how the parts fit into the lower receiver to make it easier when you reassemble. Note how the legs of the hammer spring are on top of the trigger pin. To remove the hammer and trigger pins use a punch that is about 1/8″. Punch the hammer pin out of the lower. The hammer will probably be stuck to the rear still. Keep in mind that the hammer is under tension and is going to come flying out of the lower when it is released. So have the lower pointed in a safe direction and also where the hammer can’t get lost when it comes out of the lower. You may have to pull the trigger to get the hammer to release from the lower.
Once the hammer is out you may see the primer inside. You may be able to get it unstuck without removing the trigger at this point by using a small pick or punch.
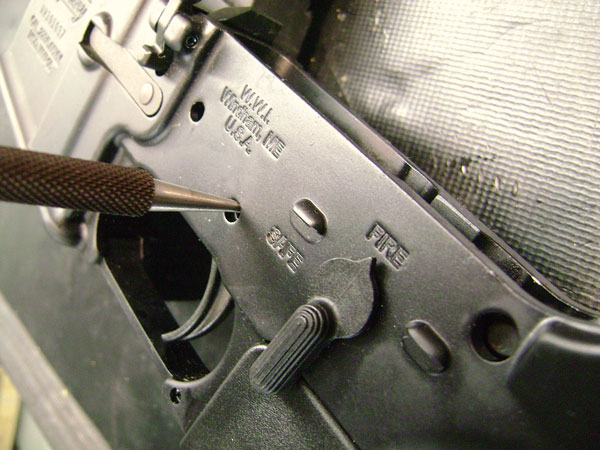
If not just drive out the trigger pin and remove the trigger. The disconnector will also come out with the trigger. Note its orientation.
ou will see the primer in the lower at this point. Also make sure there isn’t any other debris in the lower that might interfere with the proper operation of the rifle.

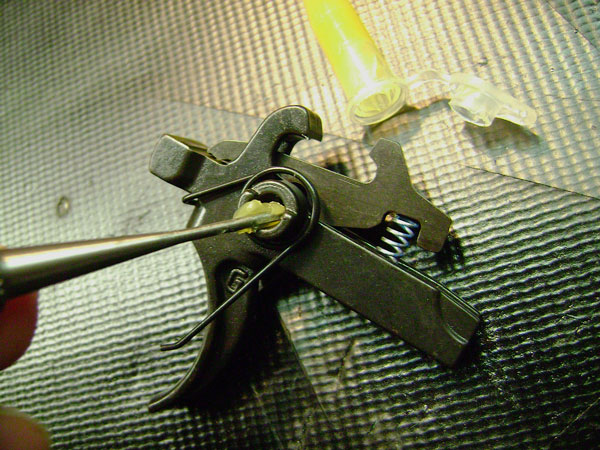
Reassemble the trigger and disconnector and push them back into the lower. Line up the hole in the disconnector with the holes in the hammer and push the trigger pin back in. Then reinstall the hammer making sure the legs of the spring rest on top of the trigger pin and push the hammer pin back in.

Blown primers do happen from time to time with reloads or factory ammunition so when you find a blown primer it doesn’t mean there is anything wrong with your rifle. However, if you are experiencing blown primers commonly with factory ammunition this does indicate that there may be a chamber problem with the rifle.

How to install the Osprey Carbine Gas Piston Kit

1. Verify your weapon is safe
2. Remove Bolt Carrier Group
3. Remove Firing Pin Retaining Pin
4. Remove Bolt Cam Pin
5. Remove Bolt
6. Carefully remove the 3 gas rings. They are not needed
7. Install existing Bolt into the New Bolt Carrier
8. Align Bolt and install Bolt Cam Pin
9. Insert Firing Pin and Firing Pin Retaining Pin
10. Remove existing handguards. You will not need them
11. Using a 1/16″ punch, remove the Gas Tube Spring Pin. You will not need it
12. Remove Gas Tube from Front Sight and Upper Receiver
13. Install Bushing into Upper Receiver using a military style cleaning rod
14. Install Piston Chamber into the Gas Port of Front Sight
15. Using a 1/16″ punch, verify the holes are aligned
16. Install the solid Pin included with the kit into the Front Sight
17. DO NOT USE OLD GAS TUBE SPRING PIN
18. Make sure it is flush with the Front Sight
19. Take note of orientation of the Operation Rod flat part, it needs to be facing up
20. Install Operation Rod into Upper Receiver
21. Insert Piston into Piston Chamber
22. With flat part facing up, assembly both parts together
23. Install Operation Rod Clip into hole
24. Use a flat head screwdriver to secure the rod clip around the Operation Rod
25. Make sure the assembly moves freely
26. Install new handguards. DO NOT USE OLD ONES. They are different
27. Verify you can see the Operation Rod inside the Upper Receiver
28. Install Bolt Carrier Group
29. You are done!

How to change a Standard Rifle Stock to a Telestock


First make sure the rifle is unloaded. Then remove the upper from the lower by pushing out the takedown and pivot pins. Put the lower receiver on an AR15 lower receiver vice block and remove the upper rear stock screw with a flat screwdriver. Remove stock body.


Remove takedown pin detent spring from lower and set aside.

Remove buffer and spring by pushing down on buffer retainer and releasing the buffer and spring.
Remove both completely from the lower and set aside.


With the cutout portion of the tele stock wrench loosen the buffer tube but don’t unscrew it all the way. (If you are not using this style of tele stock wrench simply use an end wrench)
Before doing so make sure you put a thumb over the buffer detent to keep it from shooting out of the lower when you turn the buffer tube all the way off. Release the buffer detent and spring slowly and leave them in the lower.


Screw the tele stock buffer tube all the way in while holding the buffer retainer down with your thumb. Turn the stock in until it stops against the retainer, then back it off until it holds the retainer in, but isn’t rubbing on it hard. The buffer retainer should move up and down freely when you press on it.

Stock should be straight with the pistol grip

Reinstall takedown pin detent spring. Make sure it is square against the tele stock endplate and push the spring in then screw the castle nut up against it.


Tighten castle nut down snugly with the wrench. It is also okay to use a little blue Loctite on the threads to keep it from loosening. (Or stake the nut on if you want a more permanent installation. I covered castle nut staking in the May 2013 newsletter.)

Push the carbine buffer and spring that came with the tele stock assembly into the buffer tube and you are done.


To remove a tele stock and install a standard stock assembly you basically just reverse these instructions. The only thing to be mindful of is to back the castle nut off enough to remove the takedown pin detent spring completely before turning the tele stock off so you don’t damage it.

Installing the Geissele G2S Trigger

The excellent Geissele trigger comes with a set of instructions but I thought it might be helpful to provide a pictorial instruction to make it a little easier.

First make sure rifle is unloaded then push out the takedown and pivot pins and remove the lower from the upper.
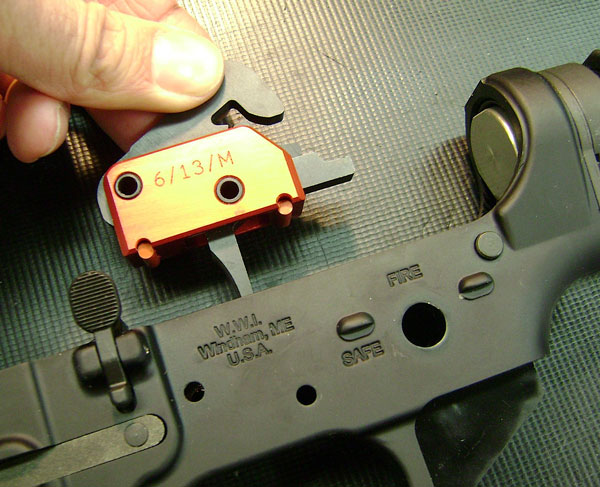
Using a 1/8″ or smaller punch, punch out the hammer pin then the trigger pin and remove the stock hammer, trigger, disconnector and pins and put aside.


Lubricate any bearing surface with the provided grease. Hammer/trigger pin holes and sear surfaces

Line up the disconnector hole with the trigger pin hole in the receiver and tap in the trigger pin provided with the Geissele trigger.

Install the hammer pin retainer on the hammer. This is very important. If this is not installed the hammer pin will walk out and may cause serious and potentially dangerous malfunctions.


Put hammer in as shown. Make sure the legs of the hammer spring are on top of the trigger pin. It is the legs of the hammer spring that keep the trigger pin from walking out.


It’s easiest to put the hammer in if the lower is on a lower receiver vise block as the legs of the hammer spring are very stiff. Push the hammer down until the hammer pin hole lines up with the receiver and push a 5/32″ punch into the hole in the receiver to hold the hammer in place. Insert the hammer pin in the other side. You will have to move the punch around a bit to get the holes to line up. Once they are lined up push the pin in with a plastic or wooden hammer far enough so you can remove the punch from the other side. Then move the hammer around until the holes line up on the other side and push the hammer pin the rest of the way in.
Reinstall upper onto lower and function test lower for proper function. Refer to page 6 of the Windham Weaponry Operating and Safety Manual entitled “Range Safety Checks-Before You Fire”. Follow that same procedure to test the trigger group for proper function.

To purchase this fine GEISSELE 2 STAGE (G2S) TRIGGER, click here:

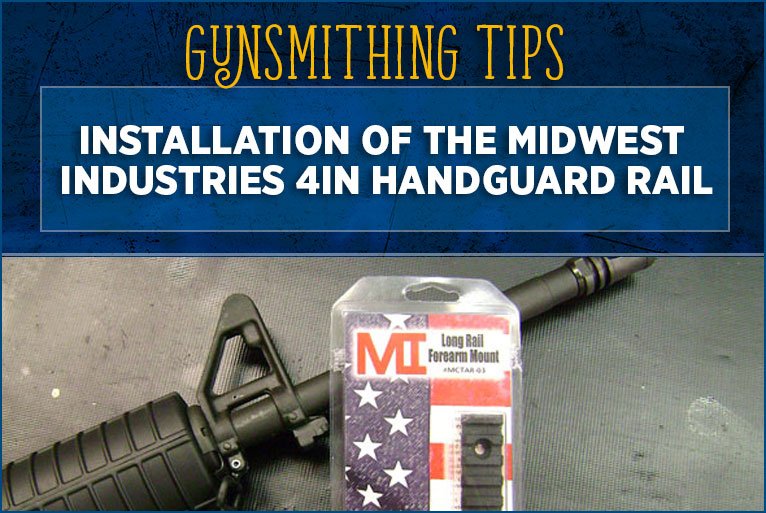
Installation of the Midwest Industries 4in Handguard Rail


To install rail, first verify that the rifle is unloaded. Then push the takedown and pivot pins out and remove the upper from the lower receiver. Remove handguards per the instruction on page 23 of your operator’s manual.

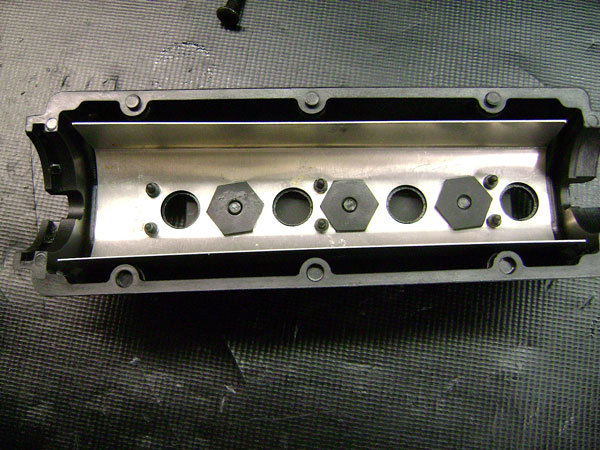
With a pair of needle nosed pliers remove the inner heat shield from the handguard.

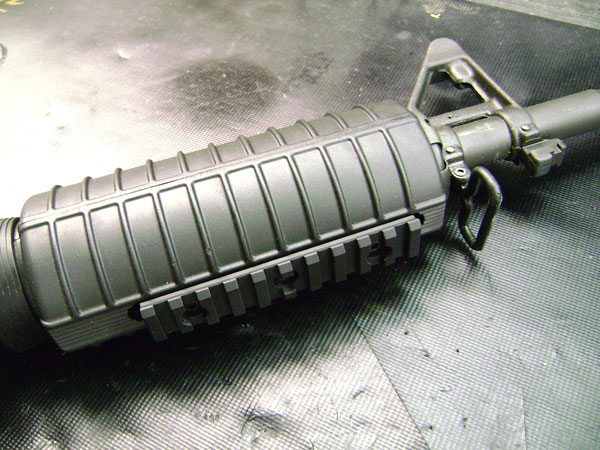
Place rail in the desired location on the handguard. There are three possible locations you can place it.

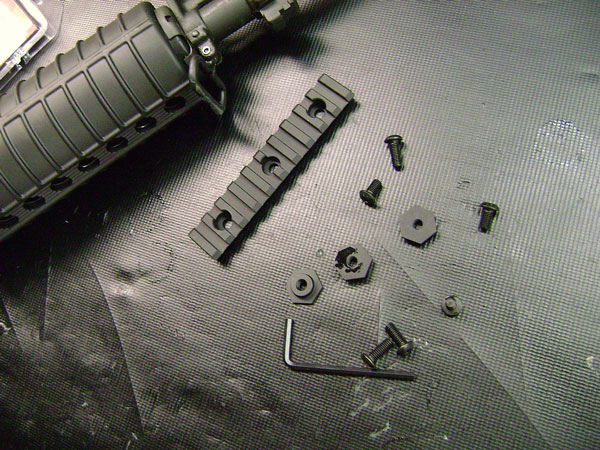
Place the rail nuts inside the handguard and tighten the screws into them with the Allen wrench provided with the rail kit. There are two lengths of screws. For our stock M4 handguards you will want to use the short screws. You can also use a little blue Loctite on these screws as well to make sure they don’t back out.


You can replace the inner heat shield if desired or leave it out. It is optional. If you put it back in it may be necessary to stake it into place by the plastic tabs or melt the tabs so it stays in place.

Reinstall handguards on rifle.
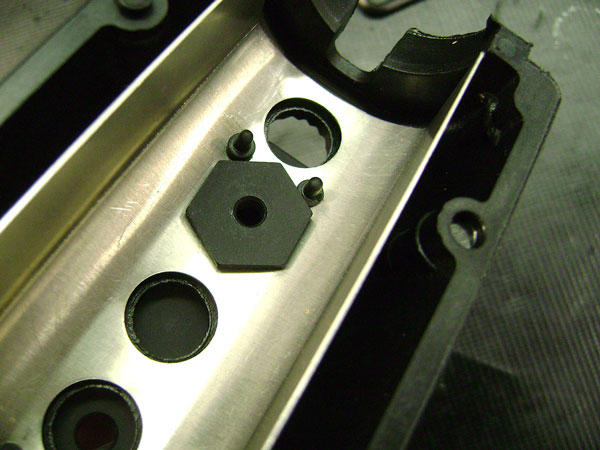
This rail is an easy and economical way to allow the mounting of a forward pistol grip, flashlight, bipod mount or any other accessory that will mount to a MIL-STD-1913 rail on your rifle.

Midwest Industries 4″ Handguard Rail in our website catalog

How to Remove / Install a Hand Guard Cap

Since some AR15 style rifles come with a triangular handguard cap, some users might find it necessary to change the handguard cap to a round style. This is necessary if an aftermarket handguard is purchased that requires the use of a round handguard cap. Currently we sell two rifles that come standard with a triangular handguard cap, our base model .308 SRC and our 20″ gov’t rifle. Many handguards, such as the Magpul MOE handguards for example, will fit either round or triangular. But if you purchased a handguard that is specifically made to fit a round handguard cap and you have a triangular one, here’s how to change it out.
First make sure the rifle is unloaded. Then push the takedown pin and pivot pin out and remove the upper from the lower receiver. Remove the bolt carrier and charging handle (see page 14 of your Windham Weaponry Operating and Safety Manual). Then remove the handguards as shown on page 23 of the manual.

Now remove the flash hider with an open end wrench.
If you have a ban compliant gun that has a welded muzzle brake, stop here as those cannot be removed.
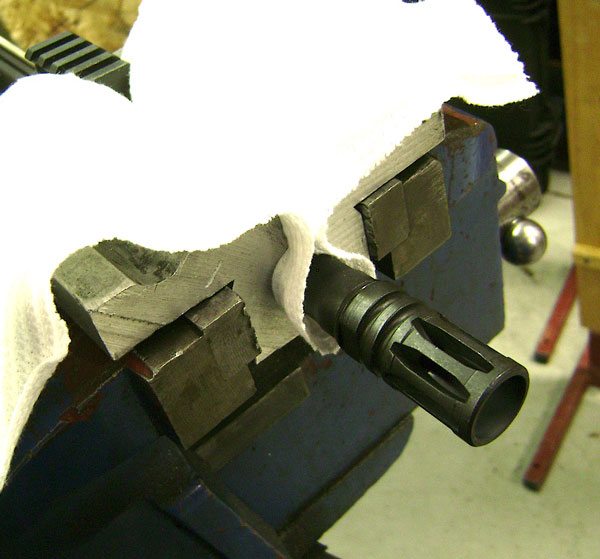
Secure the end of the barrel in a padded set of barrel jaw blocks in a vise and turn the flash hider counter-clockwise (a vise padded with wood will work too, the flash hider only needs about 15-20 foot pounds of torque for removal). Remove flash hider and crush washer and set aside.
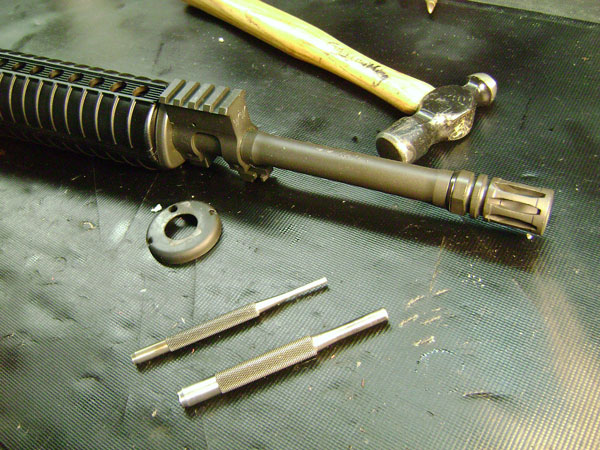

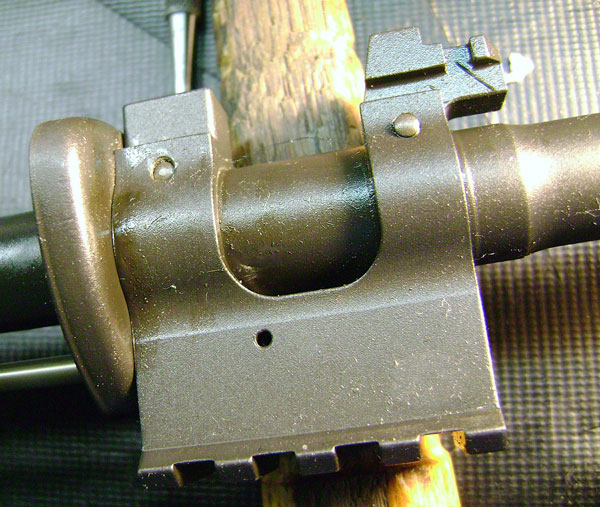
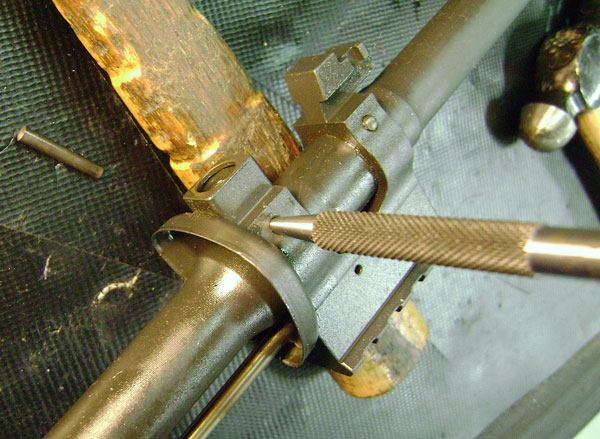
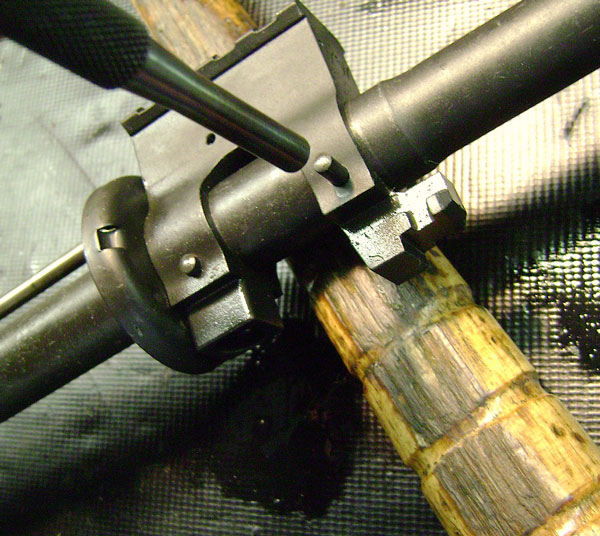
Set gas block on a hammer handle or other similar piece of hard wood so that the taper pins can be driven out of both sides. Taper pins must be driven out from left to right as shown (from the small end of the taper pin). Use a wide flat punch to start the taper pin and push it in flush, then use a 1/8″ punch to drive them all the way out.


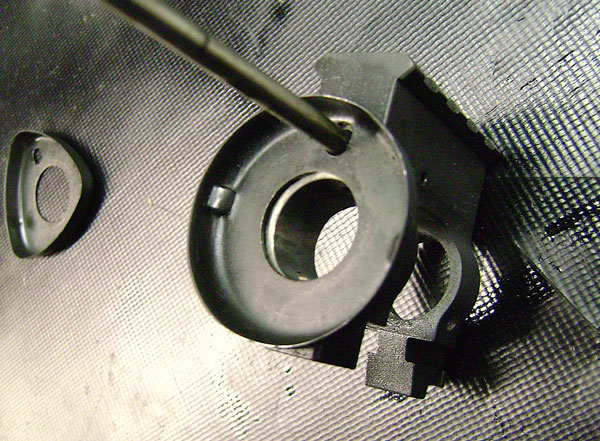
Spray a liberal amount of oil on the outside of the barrel and at the gas block area. With a wooden or plastic mallet drive the gas block/gas tube assembly off the barrel. Remove the triangular handguard cap and replace it with the round one. Wipe any grime off the barrel and gas block then re-oil the barrel. Put the assembly back on the barrel and line up the taper pin holes. Drive the taper pins back in the way they came out through the right side. Make sure the holes are lined up well. If they don’t seem to be going back in, drive them out and realign the holes and start again.


Reinstall crush washer and flash hider, install your new handguard and you are done.

Click here for the round handguard cap in our website catalog.

0
YOUR CART
0
Your cart is emptyRETURN TO SHOP