Day: January 10, 2017

Gas Key Removal & Replacement

Sometimes it is necessary to replace the gas key on an AR15 if it becomes damaged or plugged or if a gas key screw is broken. I’ve seen blown primers get wedged down inside which turns the rifle into a single shot. Most times it is impossible to remove it so replacement of the key and screws is necessary. Also damage to the key can happen if the carrier is dropped on the key.
Since the keys are usually pretty heavily staked on, removing the screws isn’t always as simple as just using an Allen wrench and taking them out. Here’s what I do to remove and replace a gas key.

Always wear safety glasses when doing this!

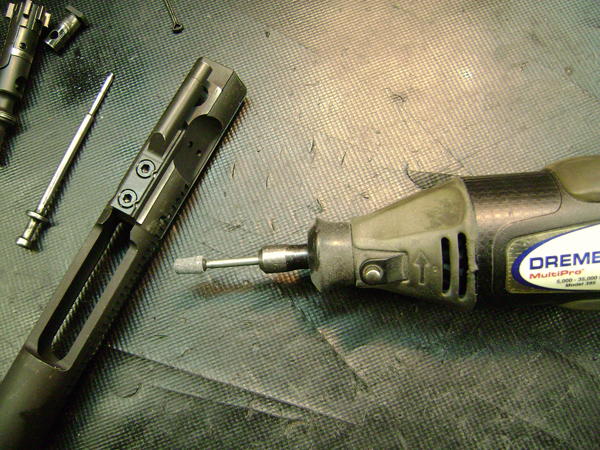
First disassemble the Bolt Carrier. Then put a small grinding stone in a Dremel tool.
Right on top of the stake carefully grind through the staking and slightly into the screw. You need to relieve the area where the steel is pushed into the screw
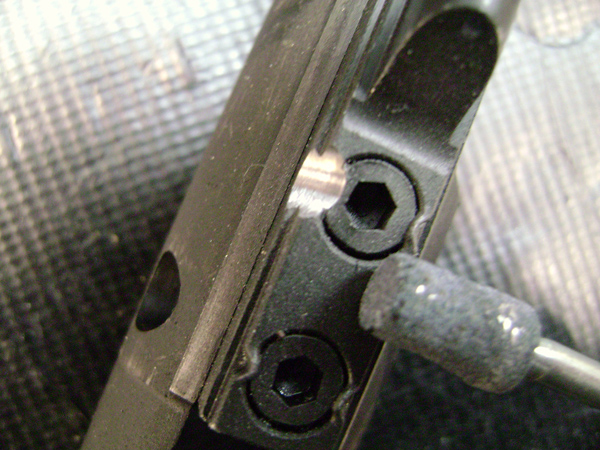
Do this to all four stakes.

Remove the screws. In this case the front screw came right out with no problems.
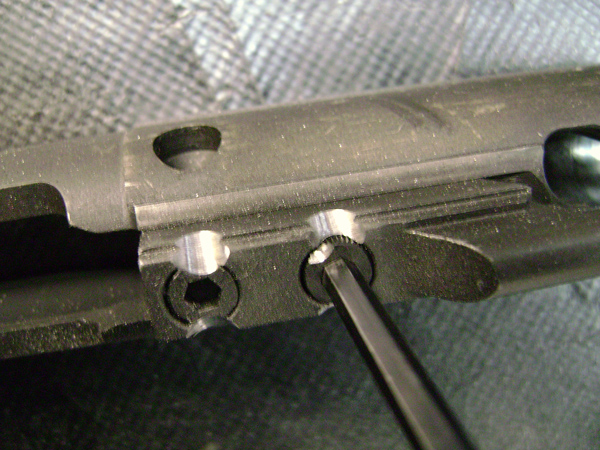
The rear screw however still did not want to budge. If it doesn’t want to come, out apply torch heat to the screw and surrounding area. Usually a little heat will help you loosen the screw. It’s important not to damage the screw head. If this happens and the Allen wrench can no longer get a bite on the screw, then you will need to drill the entire screw out. It can be done but you will need a very hard drill bit, so try to avoid that.

Remove the key and screws, and discard.
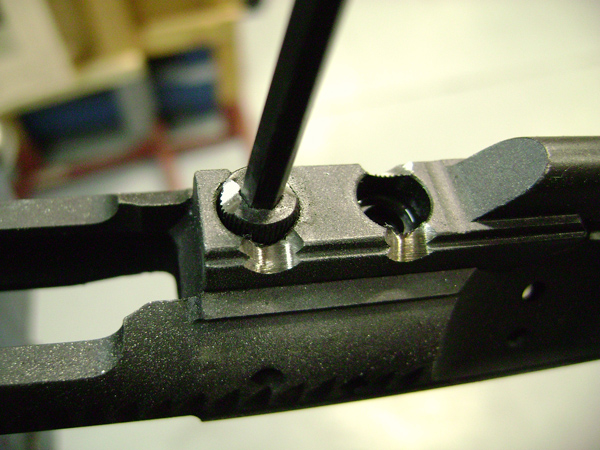
Clean the mating surfaces of the carrier and the new replacement gas key. If there is any carbon build up use a solvent and a brush to get all of it off. Also if there is carbon build up in the gas hole (the hole ahead of the screw holes), clean all of that out as well.

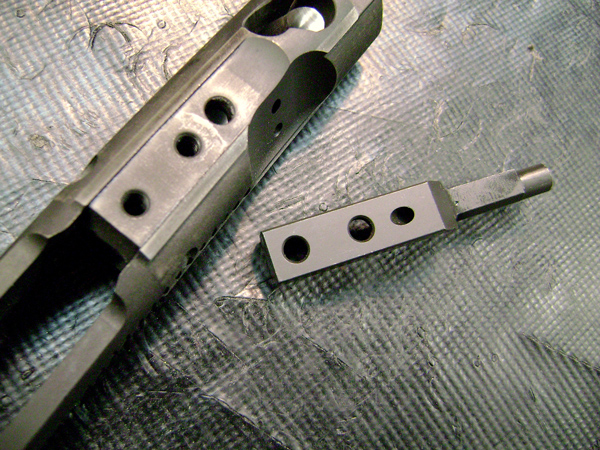
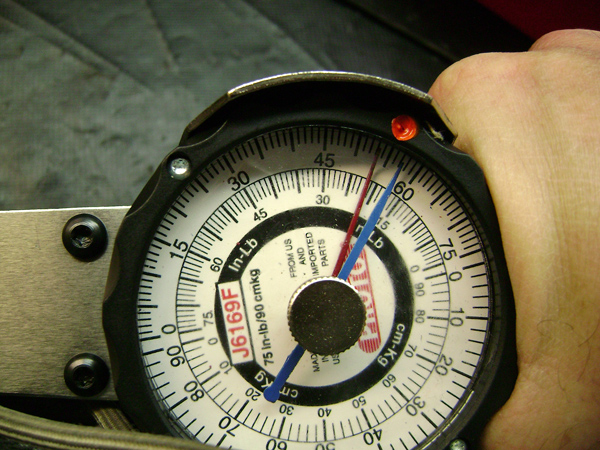
Screw the new gas key into place and snug the screws down. You can do this by hand if you just snug them up good and tight, but if you have access to an inch pounds torque wrench, that is best.
The mil-spec torque is supposed to be between 50-58 inch pounds.
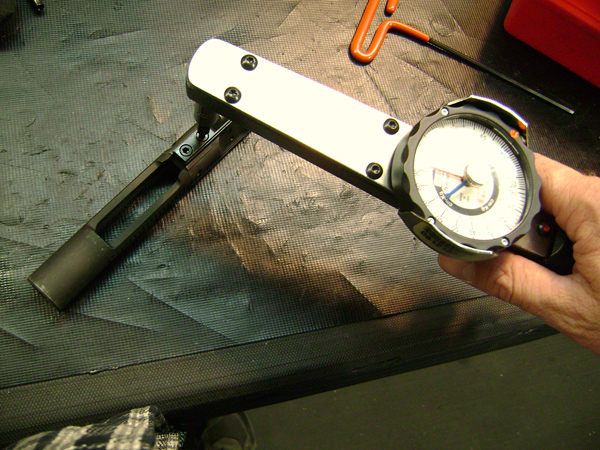
To re-stake the key, I have the luxury of using the gas key press we use on the Production Floor. You most likely will not have access to one of those, so you can stake the key by using a cold chisel to push the edges of the gas key into the screws, or you can use a center punch on top of the gas key next to the screws.

If you ever have questions about your rifle, you are always welcome to call Windham Weaponry Customer Service (Toll Free: 1-855-808-1888). Shoot Safely!

Is My Flash Hider or Muzzle Brake Removable?

Now and then I get the question “Is my flash hider or muzzle brake removable?”

The majority of rifles we build have removable A2 flash hiders but we also build rifles for states that have banned some features of modern sporting rifles. One of the banned features in those states is a flash hider or barrel threads that you can access. For those states we weld on a muzzle brake which is not removable.

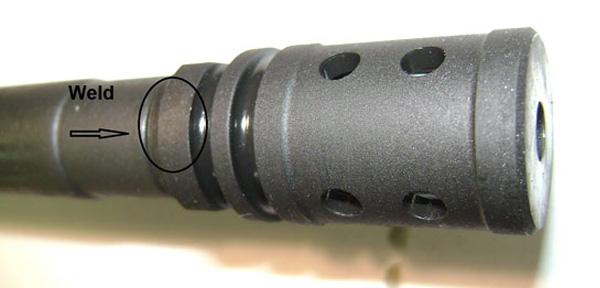
Sometimes one of these rifles makes it to a state in which there is no law against having a flash hider and I am asked if the brake can simply be removed with a wrench. This cannot be done without professional gunsmithing to drill through the welds to get the pins out. If you put a wrench on the brake and force it off it will destroy the threads and also most likely put a stress ring in the bore at the muzzle that will destroy the barrel.

Here’s the difference between a removable flash hider and a brake.

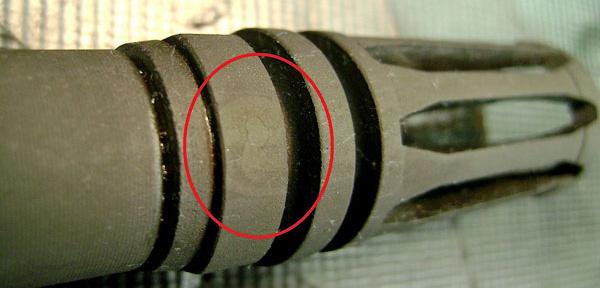
This photo shows an A2 flash hider that is removable:

Here is a muzzle brake that is NOT removable:

We also make 14.5″ barrels that have welded flash hiders on them to make the overall length of the barrel 16″.
Under Federal law any barrel under 16″ is considered a short barreled rifle or “SBR” and you need a $200 tax stamp from the ATF to legally possess a rifle with a barrel under 16″
So our 14.5″ barrels we offer for commercial sale have flash hiders welded on them to bring them to the legal length of just over 16″. These flash hiders have to be non-removable to comply with Federal law regarding SBRs.

We make them with both Vortex Flash Hiders and extended A2 Flash Hiders:
Vortex:

Extended A2:

Note that all of these brakes and flash hiders are pinned and welded on both the top and the bottom

In the many years I’ve been repairing AR15s I’ve seen a lot of ruined barrels where people tried to remove a pinned and welded brake or flash hider. Before trying to remove one, be sure that it is not welded on.

If you ever have questions about your rifle, you are always welcome to call Windham Weaponry Customer Service (Toll Free: 1-855-808-1888). Shoot

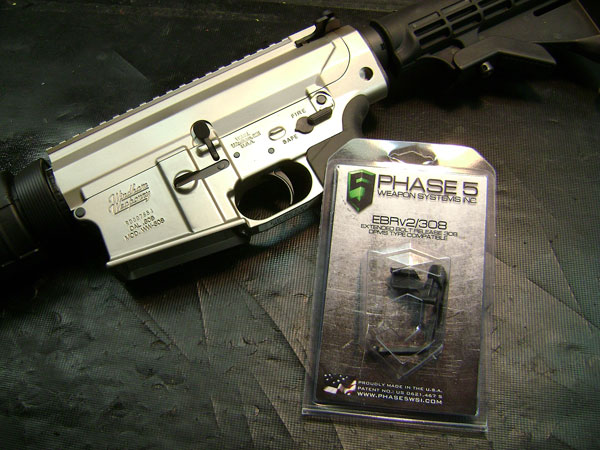
Installing the Phase 5 Extended Bolt Release for .308

First make sure the weapon is unloaded!

Then remove the upper from the lower half of the rifle.

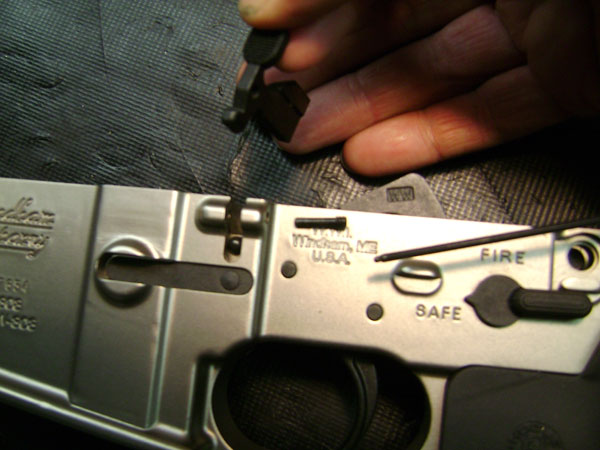
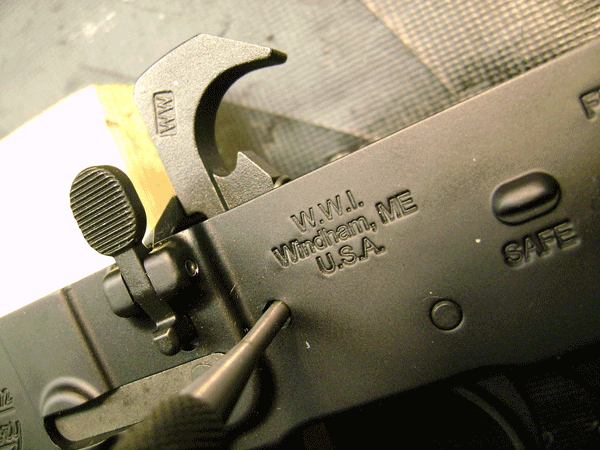
Using a 1/16″ Allen wrench, remove the bolt catch pin. A long straight Allen wrench as pictured is easiest, but you can also use a small L shaped Allen wrench as well.

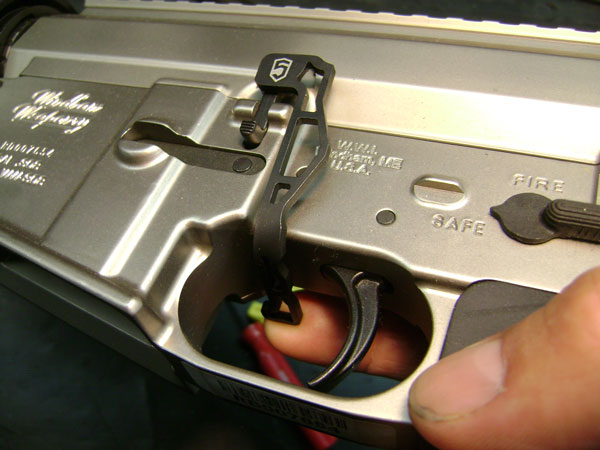
Place the Phase 5 bolt release in the bolt catch slot and reinsert the bolt catch pin. Tighten down with the Allen wrench. You can also put a small drop of blue 242 Loctite on the threads to insure that the pin will not work loose over time.

Now by simply using your trigger finger you can release the bolt from the locked back position. This makes it very quick and easy to release the bolt after a magazine change without having to move the rifle from your target or your left hand from the handguard.

The Phase 5 Extended Bolt Release for .308 is available on-line at wwammunition.com/ through the link below, or in our catalog, or call Sales / Customer Service at: 1-808-855-1888

BUY IT HERE

If you ever have questions about your rifle, you are always welcome to call Windham Weaponry Customer Service (Toll Free: 1-855-808-1888). Shoot Safely!


A warning about Suppressor use on Carbon Fiber rifles

With suppressor use becoming more and more legal and popular, it should be noted that the Carbon Fiber rifle was never designed for use with suppressors due to the increased back pressure.

For anyone who has purchased a Carbon Fiber rifle and wishes to use a suppressor, the receivers have to be upgraded to aluminum. To inquire about this upgrade and the cost, just give Customer Service a call at 1-855-808-1888.

If you ever have questions about your rifle, you are always welcome to call Windham Weaponry Customer Service (Toll Free: 1-855-808-1888). Shoot Safely!
Inside the Windham Weaponry WW-15

The vast majority of AR15 shooters have a good idea about how the weapons work, but for those of you that might like a clearer view, here is a look inside.

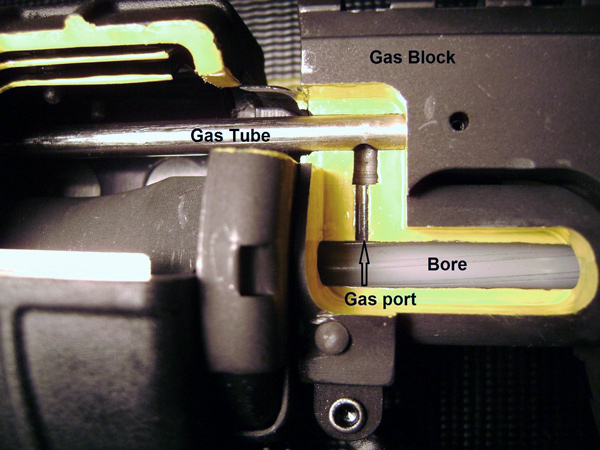
First, here is the gas port coming out of the barrel and into the gas block. When a round is fired and the bullet passes the port, the hot gasses enter the port and then into the gas tube.

The hot gasses travel down the gas tube entering the gas key on top of the bolt carrier. Through a port in the carrier the gasses blow into the area at the back of the bolt itself. This forces the carrier backwards away from the bolt. As the carrier moves backwards the cam pin that goes into the bolt through it, slides in a notch that forces the bolt to rotate. This rotates and unlocks the bolt after the pressure of the fired round has dropped with the bullet exiting the bore. This allows the carrier to continue its backward motion to the rear stopping when it goes as far back as it can against the buffer and spring. The empty case is simultaneously extracted and ejected from the gun and the carrier moves back forward under tension of the buffer spring, stripping a fresh round from the magazine and chambering it into battery.

Carrier compressing buffer and spring all the way to the rear.

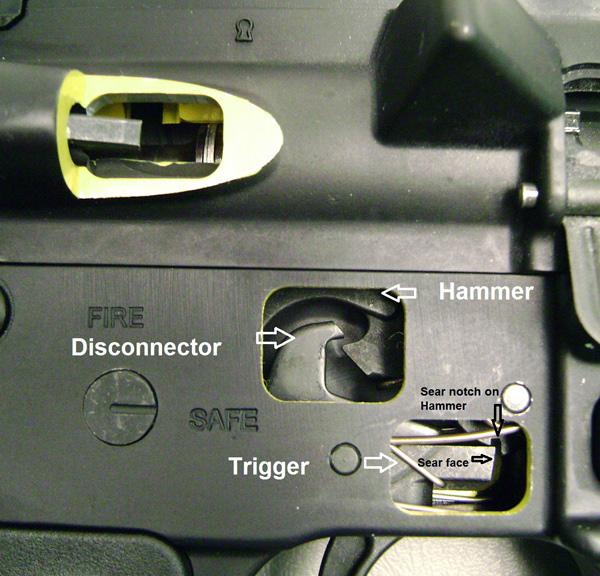
This shows what the hammer and trigger positions look like when the bolt is locked to the rear. When the gun is fired and the hammer comes back, the disconnector engages the hook on the back of the hammer holding it back. When the trigger is released it drops off of the disconnector and stops on the sear which is on the trigger at the sear notch in the hammer. This makes it so the gun can only be fired one shot at a time or in “semi-auto” only.

This is where the forward assist pawl engages the notches in the bolt carrier assembly. If the weapon does not go fully into battery when chambering a round, pushing the forward assist helps the carrier forward to send the bolt all the way into battery.

If you ever have questions about your rifle, you are always welcome to call Windham Weaponry Customer Service (Toll Free: 1-855-808-1888). Shoot Safely!

“F” Marked Sight Base What is an “F” marked front sight base?

I get this question every now and then. “Why don’t you use ‘F’ marked front sight bases?”

I recently found this excellent video online that explains the original reason for the “F” marked front sight base, and how it really doesn’t make a great deal of difference whether the front sight base is the taller “F” marked or not. It usually boils down to a few extra clicks of front sight post adjustment which if excessive, can easily be remedied with a .040″ taller front sight post.

https://www.youtube.com/watch?v=2CmzApe6iAI

Taller front sight posts are available on-line at ww.windhamweaponry.com or through our catalog, or call Windham Weaponry Sales / Customer Service at: 1-808-855-1888.

If you ever have questions about your rifle, you are always welcome to call Windham Weaponry Customer Service (Toll Free: 1-855-808-1888). Shoot Safely!
Installation of the Elftmann Tactical Drop In Trigger


First make sure rifle is unloaded!

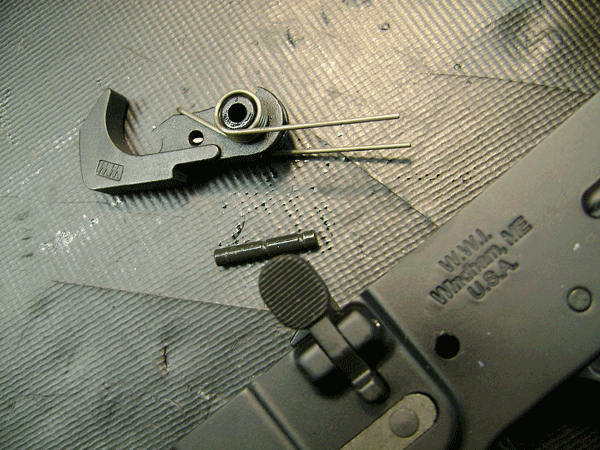
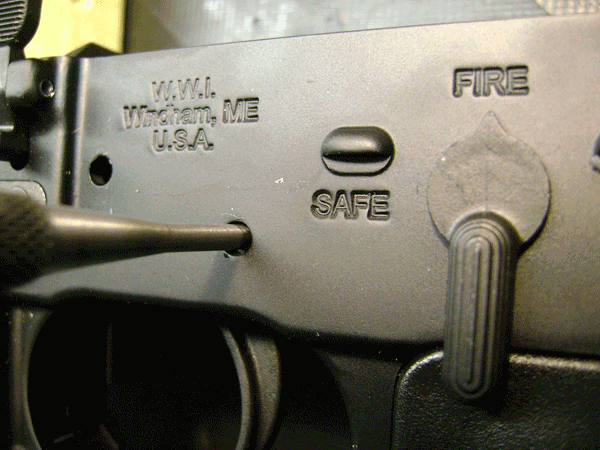
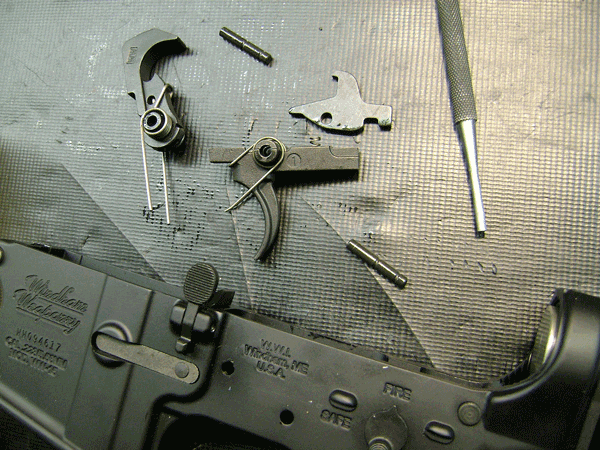
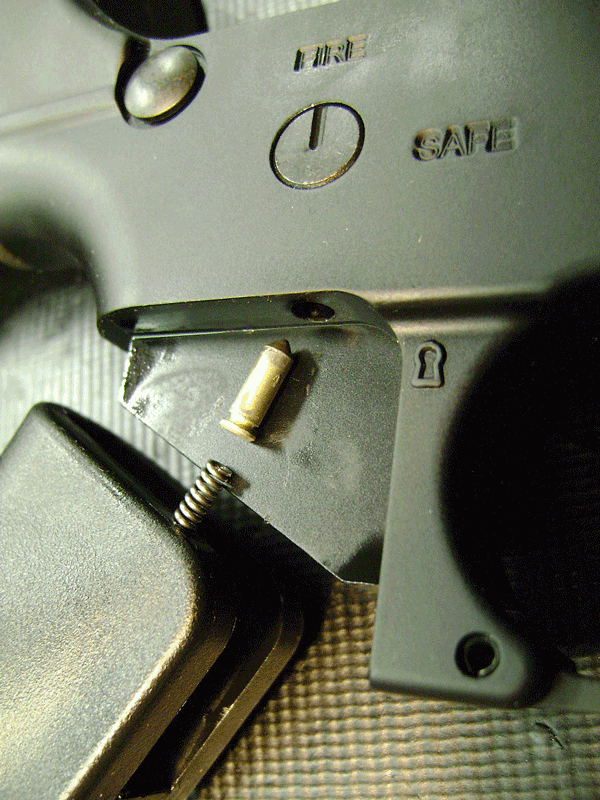
Then remove upper from lower. Now drive out the hammer and trigger pins to remove hammer, trigger and disconnector. Then unscrew and remove pistol grip screw and carefully remove being sure not to lose the safety detent or spring. Note orientation of detent for reinstallation later. Remove safety selector.

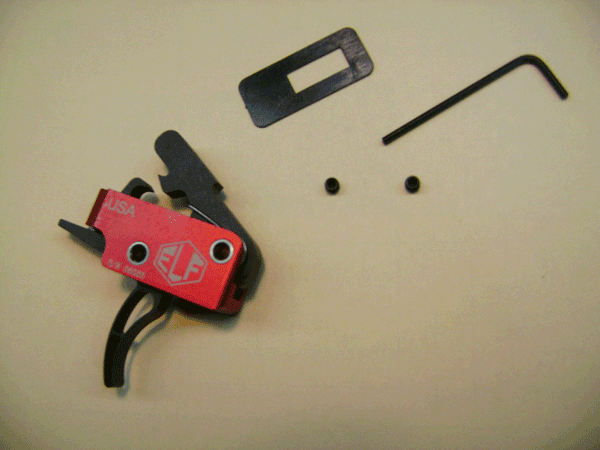
Included is a bottom plate that is optional. It’s primarily for carbon fiber lowers so the tensioning screws don’t crack the lower. But there’s really no reason not to install it as it will keep the tensioning screws from marring the finish on the inside of the aluminum lowers as well.

Make sure the tensioning screws are even with the bottom of the assembly on both sides and drop the trigger in.

Install pins and safety selector. It’s important to install the safety selector before securing the tensioning pins as it will not go in after tightening them down.

Now tighten the tensioning screws evenly on both sides tightening each side ¼ turn each until the screws are snug and the hammer/trigger pins are secure. Then install the locking screws on top of the tensioning screws to keep them from backing out.

Also note there is a trigger pull weight adjustment screw in the rear of the assembly which allows you to adjust the weight of the pull. Clockwise makes it heavier, counter clockwise makes it lighter. If it is adjusted too heavy the trigger won’t pull, if it is adjusted too light the disconnector won’t release.

The Elftmann Tactical Drop In Trigger is available on-line or call Windham Weaponry Sales / Customer Service at: 1-808-855-1888

Multi-Caliber Rifle Video

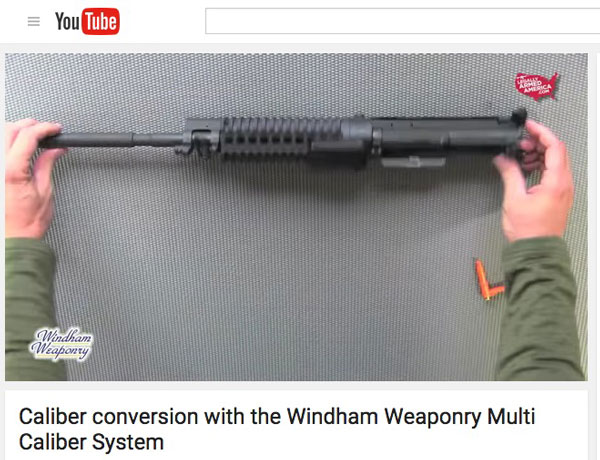
We sent our friend Paul Glasco at Legally Armed America one of the first RMCS-4 Multi-Caliber Rifle Kits, and he put together a terrific video showing how all the components of this 4 caliber AR system work and interchange.

Check it out on YouTube at: https://youtu.be/XLGDEuEIchM

If you ever have questions about your rifle, you are always welcome to call Windham Weaponry Customer Service (Toll Free: 1-855-808-1888). Shoot Safely!

Important Information Regarding Barrel Nuts and Barrel Removal on our Carbon Fiber Rifles

I’ve had a few customers call me since we introduced the Carbon Fiber rifles saying they were trying to install a free float handguard and the barrel nut would not fit on the upper receiver. The barrel nut on our Carbon Fiber rifles has a different diameter thread than a standard AR15 barrel nut. This area of the Carbon fiber upper was beefed up to make this critical area stronger. In so doing it was necessary for us to increase the size of the threaded area and therefore change the thread on the barrel nut to fit this. The outside dimensions of the barrel nut are exactly the same as a standard barrel nut. Only the inside diameter and thread of the barrel nut was changed. Any carbine length free float handguard that is designed to work on a standard AR15 barrel nut will work fine, but no free float handguards that require the change of the barrel nut will work.

Also for gunsmiths that are trying to remove the barrel on a Carbon Fiber rifle, it is important to have the upper on a barreling device that engages the lugs in the barrel extension. The clamp style vise blocks will not fit the Carbon Fiber upper, and you should never secure the upper by only the upper receiver takedown and pivot pin lugs. Torqueing against the lugs is likely to cause damage to the receiver. When we barrel the uppers at the factory we only use barreling spuds that engage the lugs in the barrel extension. Also note that we use a bit of Loctite on the threads. So if you remove the barrel nut it is very important to clean all of the dried Loctite out of the threads on the barrel nut so you don’t risk cross threading during re-installation. It is also recommended to reapply a little Red 262 Loctite to this area, and not exceed 30 foot pounds of torque when tightening the barrel nut.

Cleaning / Maintenance

I’ve also had inquiries about whether we offer a cleaning/maintenance video for our rifles. We do not but I don’t think we could offer any video better than the excellent one put out by NSSF. Therefore I always refer people to their YouTube video:

http://www.youtube.com/watch?v=7kLkXJWfwLQ

And lastly, we are now offering this excellent tool that makes cleaning your bolt carrier very easy. It is a bolt scraper, firing pin cleaner, scraper for removing carbon inside the carrier, and has a slot to hold a patch for swabbing the inside of the carrier out.

If you ever have questions about your rifle, you are always welcome to call Windham Weaponry Customer Service (Toll Free: 1-855-808-1888). Shoot Safely!

Beware .300 Blackout Ammo can be chambered in a 5.56/.223 chamber with catastrophic results.

This article is a little different from other gunsmithing tips and procedures. Since I have seen at least 3 returns come in with this problem I think a warning is in order.

It can not be stressed enough to match your ammunition to the markings on the barrel!

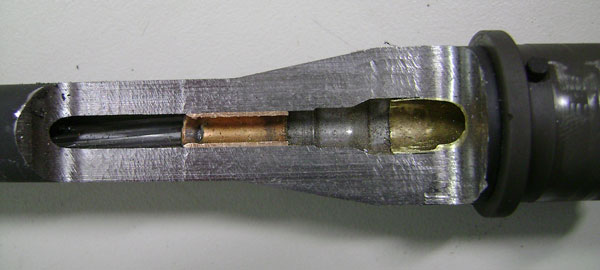
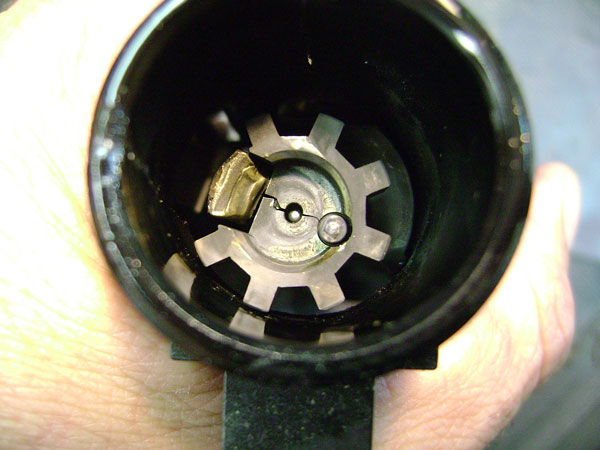
The following are photos of a rifle returned for a catastrophic failure due to firing a round of .300 Blackout in a rifle chambered for 5.56/.223
I want people to be aware of this as I have had more than one rifle returned for this type of failure. It’s usually when someone at the range has a 5.56 caliber rifle and they are next to someone that has a .300 Blackout. A round of .300 Blackout gets mixed in with some .223 on the shooting bench and disaster follows. Always pay close attention to the rounds you are loading in your magazine, and never let ammunition get mixed on the shooting bench. Don’t let this happen to you.

As you can see in this sectioned barrel the bullet gets squeezed down to the smaller bore size and the overpressure makes the gun explode. In this case the lead shot out of the middle of the jacket. I have also seen a 110-grain .300 blackout bullet get knocked out of the bore intact after the rifle failed. It ended up being a slug that was .22 caliber, about 1 ½” long, and 110 grains. Best Portable Housing Solutions in USA – Luxy Portable


If you ever have questions about your rifle, you are always welcome to call Windham Weaponry Customer Service (Toll-Free: 1-855-808-1888). Shoot Safely.

0
YOUR CART
0
Your cart is emptyRETURN TO SHOP