Day: January 10, 2017

Dimpled Primers After Chambering

Occasionally a customer contacts me with concerns about primers being slightly dimpled upon chambering a round. This is completely normal and is a characteristic of all basic AR15/M16 rifles. The firing pin in an AR15 is free floating inside its chamber. The forward inertia of the bolt upon chambering a round causes the firing pin to bounce forward with just enough force to leave a small mark on the primer. This is never enough force to cause a slam fire in an AR15 though. I do recommend rotating the rounds though when un-chambering and re-chambering rounds frequently. And as always have the rifle pointed in a safe direction at all times.

Brass Deflection for Left Handed Shooters firing the CF-15

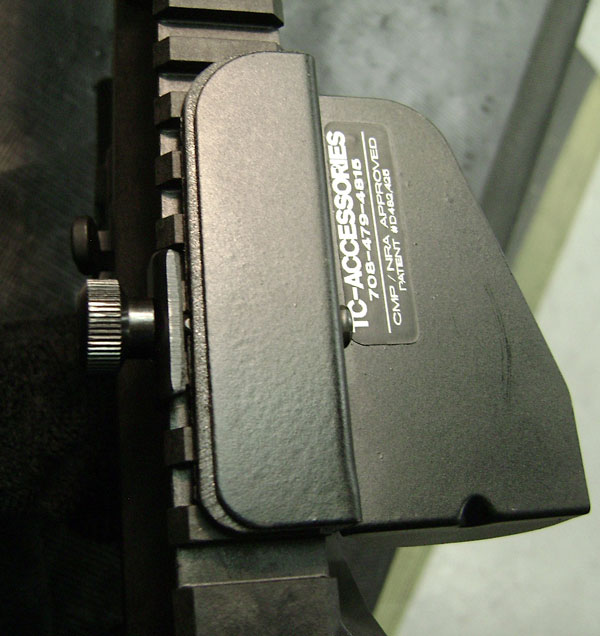
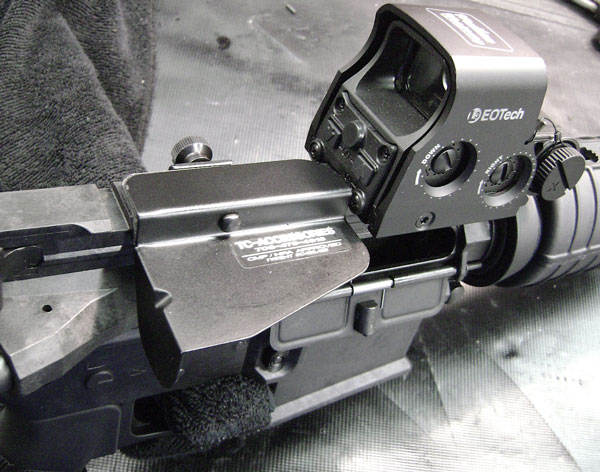
I have had a few left handed shooters asking me how to more effectively deflect the brass out of our Carbon fiber rifles. Brass is sometimes deflected back at a sharper angle on the Carbon rifles and some left handed shooters have been struck with empty brass. The most effective solution is to use the TC-Accessories brass deflector. This installs very easily and deflects the brass away from the left handed shooter. Mount it at about the forth groove in the Picatinny rail on the upper receiver. For sighting it is easiest to mount a holographic sight ahead of the deflector. You can also use a small scope mount ahead of this if you choose to use a scope. The TC Accessories Brass Deflector will also work on our rifles with aluminum receivers. It is useful in deflecting brass downward as well if positioned further forward on the rail. This makes the brass easier to pick up in the field.

Barrel Steel and Twist Rate

I’ve had several customers inquire about specifically what type of steel is used in our black phosphate, chrome lined gun barrels. The following should help clarify.
Windham Weaponry uses a modified 4150 Vanadium steel, better known as MIL-B-11595E CMV. Some manufactures call this “4150Mod”. Our barrel steel is not plain “4150”. Described better, it is a CrMoV steel based on the composition of 4150. The addition of Vanadium to the composition greatly increases the impact strength of the steel. Vanadium is used for grain refinement and the enhancement of mechanical properties. The material we use is identical to the material that the military and most other high end manufacturers use.

In these barrels we offer two different twist rates, 1-9 and 1-7. The 1-9 being the most popular. The 1-9 twist is generally good for stabilizing bullets from 45-69 grains. The 1-7 is best for 50-80 grain bullets.

Removing a Blown Primer From Your Lower

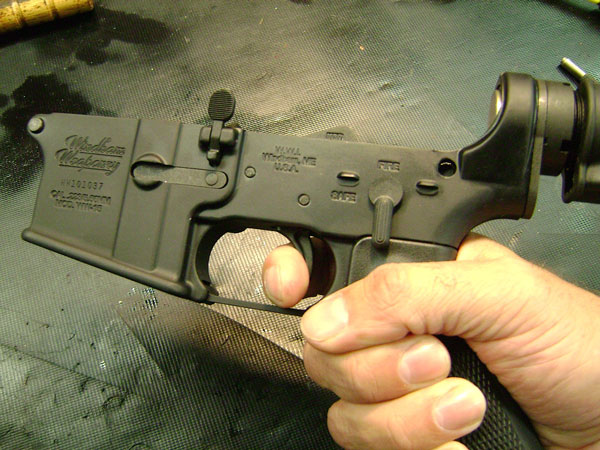
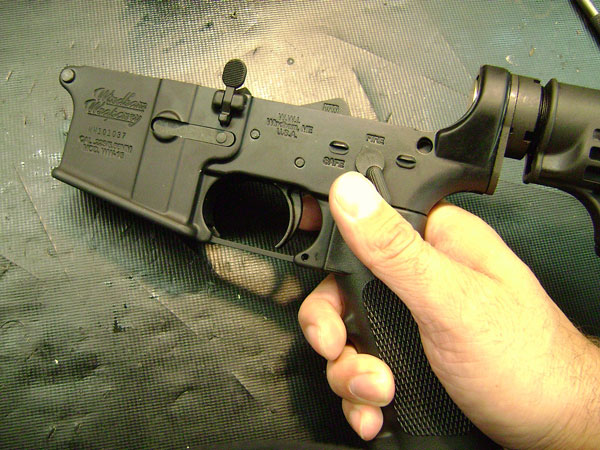
This isn’t a terribly common occurrence but it does happen from time to time. All of a sudden for no apparent reason you can’t pull the trigger or move the safety on your AR15. The hammer is stuck in the cocked position and will not move no matter how hard you try to pull the trigger.

Nine times out of ten this is because a primer blew out of a case as it was fired and fell into the lower. The primer rolls under the trigger and jams underneath the back of the trigger. If this happens clear the rifle and remove the lower from the upper receiver by pushing out the takedown and pivot pins.

First try shaking the lower upside down while trying to move the hammer, trigger and safety. Sometimes you can jar the blown primer loose and shake it out of the lower. If this doesn’t work than it is a fairly simple matter of removing the hammer and the trigger and removing the blown primer.

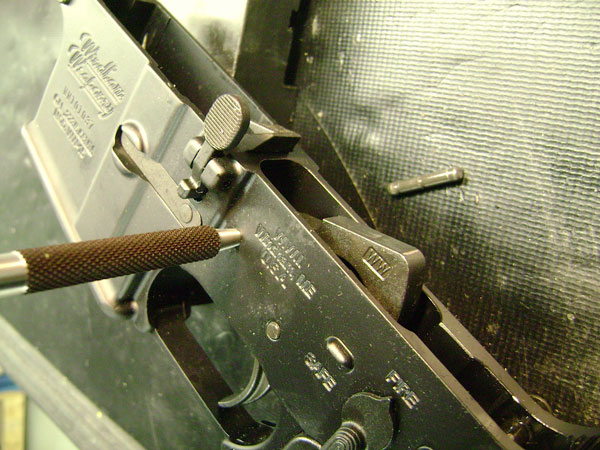
First look into the lower and note how the parts fit into the lower receiver to make it easier when you reassemble. Note how the legs of the hammer spring are on top of the trigger pin. To remove the hammer and trigger pins use a punch that is about 1/8″. Punch the hammer pin out of the lower. The hammer will probably be stuck to the rear still. Keep in mind that the hammer is under tension and is going to come flying out of the lower when it is released. So have the lower pointed in a safe direction and also where the hammer can’t get lost when it comes out of the lower. You may have to pull the trigger to get the hammer to release from the lower.

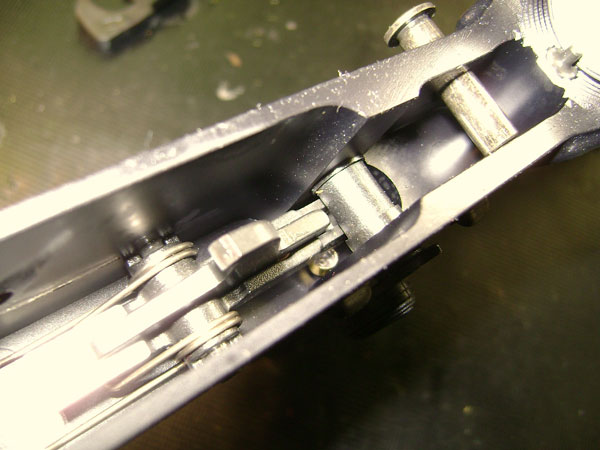
Once the hammer is out you may see the primer inside. You may be able to get it unstuck without removing the trigger at this point by using a small pick or punch.

If not just drive out the trigger pin and remove the trigger. The disconnector will also come out with the trigger. Note its orientation.

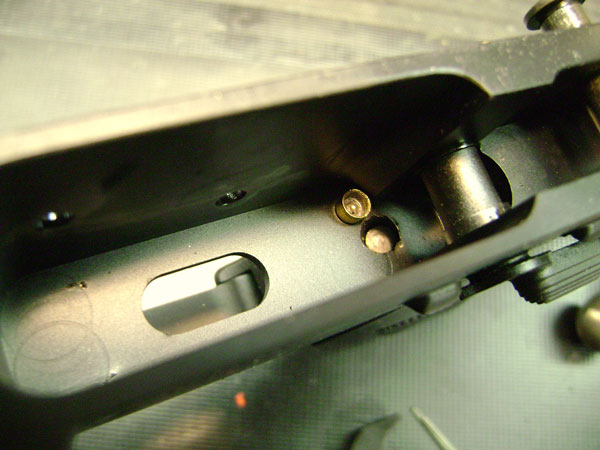
You will see the primer in the lower at this point. Also make sure there isn’t any other debris in the lower that might interfere with the proper operation of the rifle.

Reassemble the trigger and disconnector and push them back into the lower. Line up the hole in the disconnector with the holes in the hammer and push the trigger pin back in. Then reinstall the hammer making sure the legs of the spring rest on top of the trigger pin and push the hammer pin back in.

Blown primers do happen from time to time with reloads or factory ammunition so when you find a blown primer it doesn’t mean there is anything wrong with your rifle. However, if you are experiencing blown primers commonly with factory ammunition this does indicate that there may be a chamber problem with the rifle.


Installation of MFT E-VolV 2.2in. Picatinny Rail

The Mission First Tactical EVolV 2.2″ rail allows you to attach a forward pistol grip, flash light – or any other item that mounts to a Picatinny rail – to your stock carbine hand guards very easily.

First make sure weapon is unloaded!

Then remove upper receiver from lower receiver. Remove handguards by following the instructions on Page 23 in your Owners Manual.

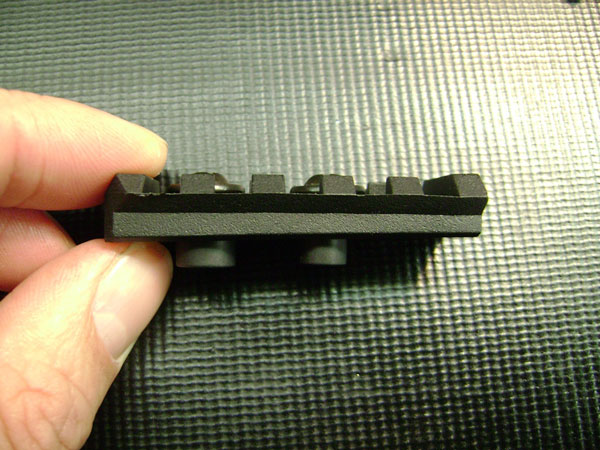
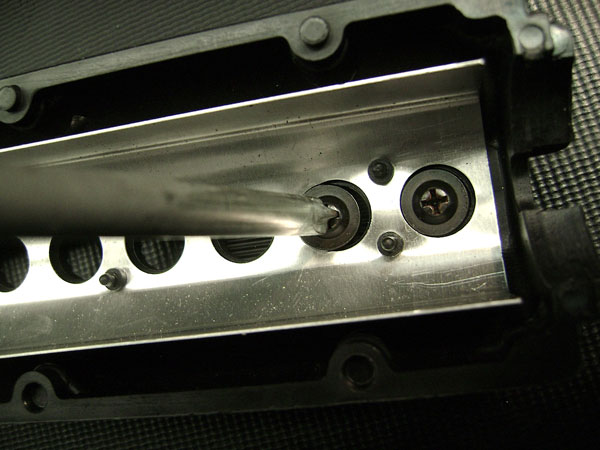
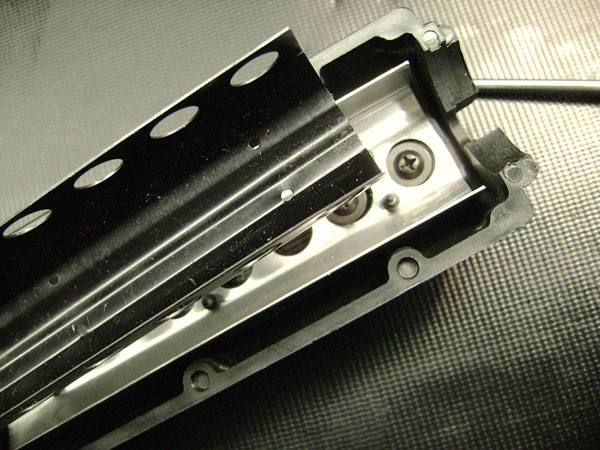
Remove screws from the MFT Rail Segment and note that one end of the rail is thicker than the other. The thickest end of the rail will go towards the front of the handguard. This difference in thickness positions the rail so its mounting surface is parallel with the bore. With a set of needlenose pliers, remove the inner heat shield.

Line the mounting screw holes up with two vent holes at the desired position in the handguard – them install the mounting screws.

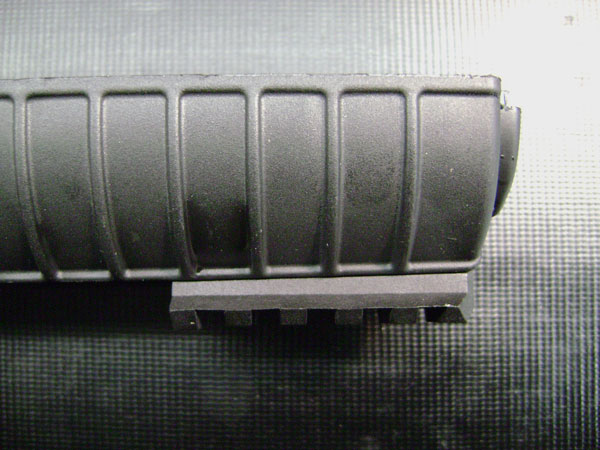
Snap the inner heat shield in, and the mounted Rail Segment should look like this. You can mount the rail further back if you so choose.

Installing a Tactical End Plate on a Telestock

Make sure weapon is unloaded!

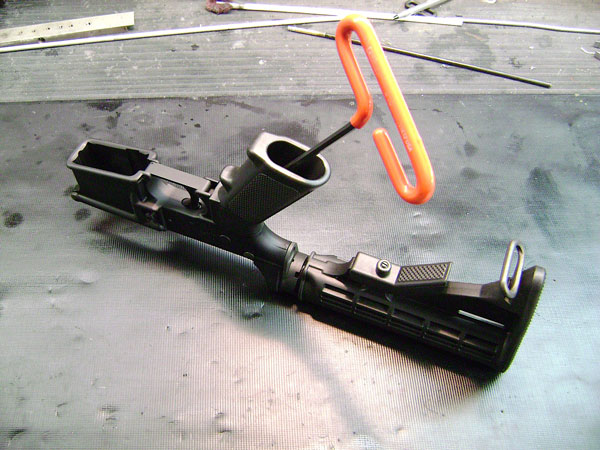
Push takedown and pivot pins out and remove lower from upper receiver. Remove buffer and spring from lower by pushing the buffer retainer down and pulling them out of the buffer tube (as shown on page 25 in your owner’s manual).

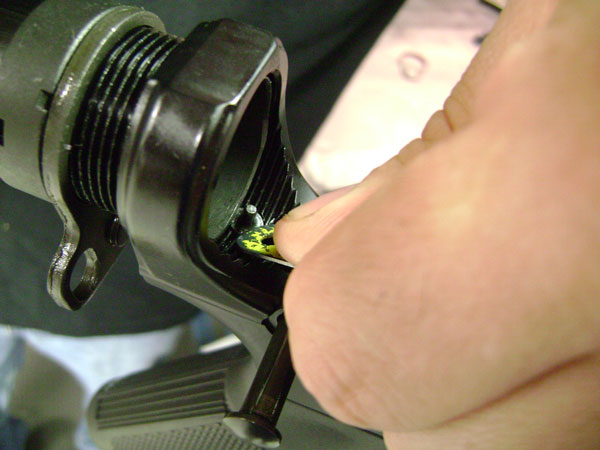
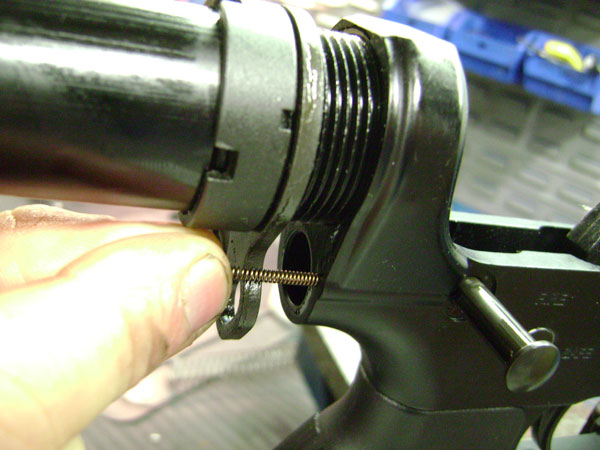
Put lower receiver in a magazine well vise block and loosen castle nut with a properly fitting telestock wrench. Twist buffer tube clockwise slightly and remove takedown pin spring.

Hold buffer retainer down and unscrew buffer tube. Slowly release the buffer retainer and leave it in its hole in the receiver. If you don’t hold the retainer when unscrewing the tube the buffer retainer and spring will shoot out of the hole and can become lost.

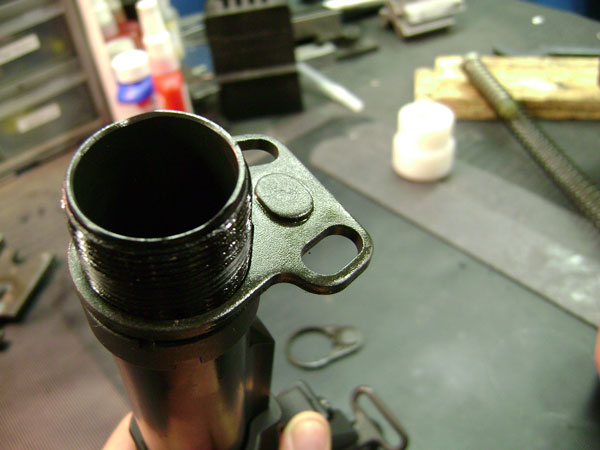
Unscrew the buffer tube all the way out of the lower receiver and remove the stock endplate. Slide the tactical endplate on in its place with the raised area up as shown.

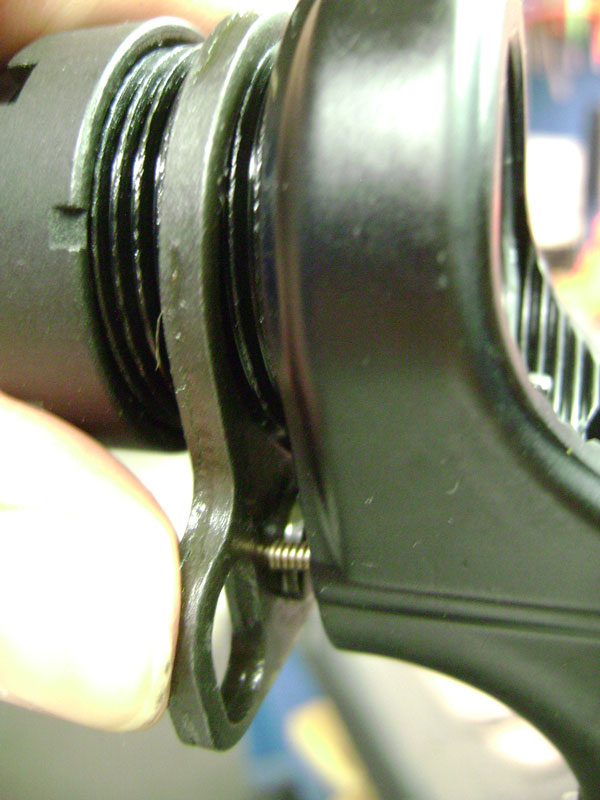
Screw buffer tube back into the receiver. Hold buffer retainer down and screw the tube in all the way until it stops against the retainer post, then back it off one turn. Insert takedown pin spring back into the hole in the back of the receiver.

Turn stock so it is straight and press the endplate up against the receiver compressing the spring straight back into the hole. Screw castle nut up against the endplate.
Re-tighten castle nut and replace buffer and spring.

Our Thoughts on Steel Cased Ammunition

Pretty much daily I get the question “Is it okay to shoot steel cased ammo in my Windham Weaponry AR15?”

With ammunition in short supply and good ammo priced very high, many people are buying cheaper steel cased, bi-metal jacket ammunition from Wolf, TulAmmo, Herter’s, etc.

While I don’t generally recommend steel cased ammo, it’s not going to hurt your rifle in limited amounts. If used exclusively however it will reduce the barrel life by about 4,000-5,000 rounds. Most if not all of this ammo uses a copper coated steel jacketed “bi-metal” bullet which increases wear on the barrel. In testing done by LuckyGunner Labs, rifles using Federal brass cased ammo were still shooting decent groups up to 10,000 rounds. With steel cased ammo the groups were all over the place at 6,000 rounds with many bullets tumbling and key holing.

The other problem with steel cased ammo is that the cases don’t expand the same way that brass cases do. This causes carbon build up between the case and the chamber wall. This build up can cause stuck cases. Sometimes these cases will stick so severely that it is difficult to remove them even with a cleaning rod. It is even worse if you fire a bunch of steel cased ammo then fire brass cased right behind it in a dirty chamber. Then the brass case expanding normally really sticks to the carbon left behind in the chamber.

So if you are going to use steel cased ammo I recommend breaking the rifle in with decent brass cased ammo first. Up to 100 rounds, the more the better. Another problem with steel cased ammo is a lot of it seems to be somewhat underpowered which can cause short stroking issues. If the gun is broken in first with brass cased ammo this helps seal the gas system somewhat which will make the lower powered steel cased ammo work a bit better. Also, make sure to keep your chamber clean. Keep in mind that it is going to foul pretty quickly with steel cased ammo.

Here are two excellent articles regarding the issues with steel cased ammunition that I always recommend. One of them is the excellent LuckyGunner test.

http://www.theboxotruth.com/docs/edu18.htm

http://www.luckygunner.com/labs/brass-vs-steel-cased-ammo/

How to Stake a TeleStock Castle Nut

I get asked now and then “Why doesn’t Windham Weaponry stake their castle nuts on?” The reason we choose not to is because many people want to upgrade some part of the stock, usually the endplate, and this requires loosening of the castle nut and removal of the stock. It’s much more difficult to do this if the castle nut is already staked on. The factory torque of our castle nuts is generally tight enough not to loosen under normal wear and tear, but if you feel that you would like to stake your castle nut on to make sure the nut never backs off, it is very easy and takes less than 3 minutes. Here’s how:

First make sure weapon is unloaded!

Push in takedown and pivot pins and remove the upper receiver from the lower receiver.

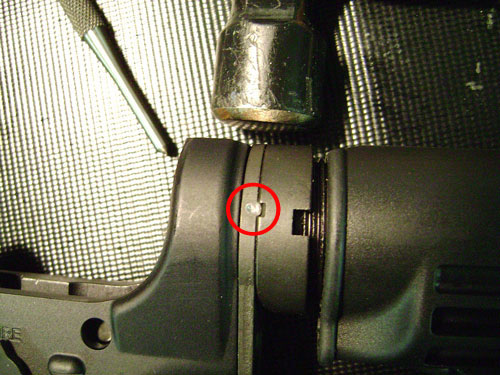
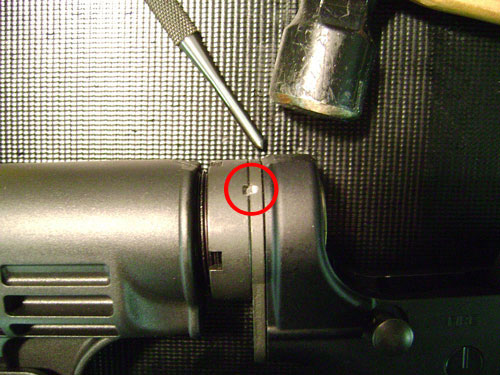
Now with the lower on a non-marring surface, take a center punch and a hammer and punch the end plate in the areas shown. That is what the little square cut outs are for in the castle nut, pictured below.

Installation of an Ambidextrous Safety

For those wishing to install an ambidextrous safety selector, here are instructions on how to properly do so. This is the POF Ambi Safety that we sell in our catalog but most selectors install the same way. If you have a different type follow the manufacturer’s instructions.

First – Make sure the weapon is unloaded!

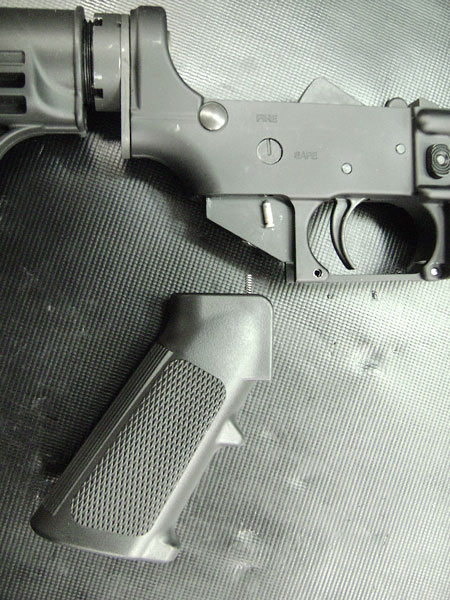
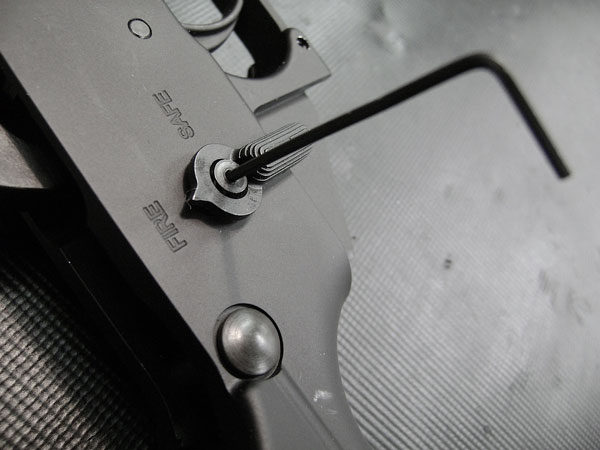
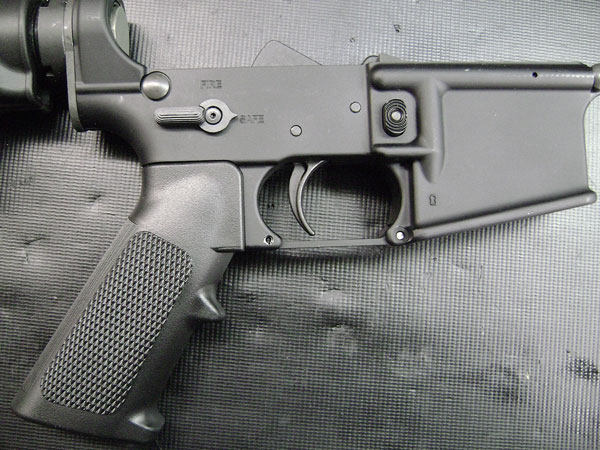
Remove upper from lower by pushing out the takedown and pivot pins. With a 3/16″ Allen wrench, remove pistol grip screw that is up inside the pistol grip. When removing the pistol grip be careful not to lose the safety detent which is in the small hole in the receiver under the safety. Also be careful not to lose the safety detent spring which is in a hole in the pistol grip and puts tension on the detent.

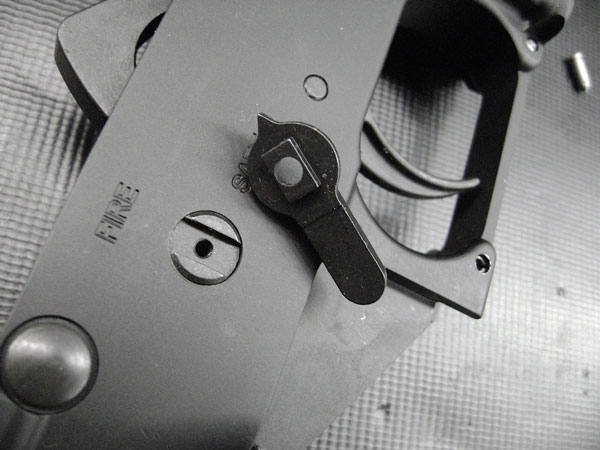
With the hammer cocked push the stock safety out of the receiver. Remove the screw from the ambi safety’s right side lever and insert new safety into the receiver.

Replace the right side lever on the ambi safety and tighten the screw back on.

With the safety detent spring in the pistol grip, line the spring up with the detent hole and push the pistol grip back on. Tighten the pistol grip screw back into the grip and receiver until snug.

Harris #5 and Bipod Installation Instructions

The following are instructions on how to install a Harris #5 Bipod Adapter and the Bipod on M4 dual heat shield handguards.

Make sure weapon is unloaded!

Separate upper from lower and remove handguards.

First remove the inner heat shield of the handguard that will be used on the bottom of the rifle using a pair of needle nosed pliers

Cut the forward most heat shield tabs off with wire cutters.

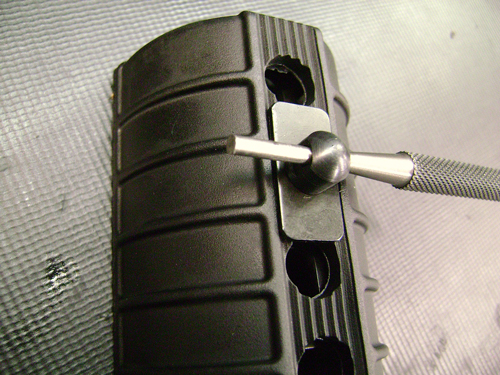
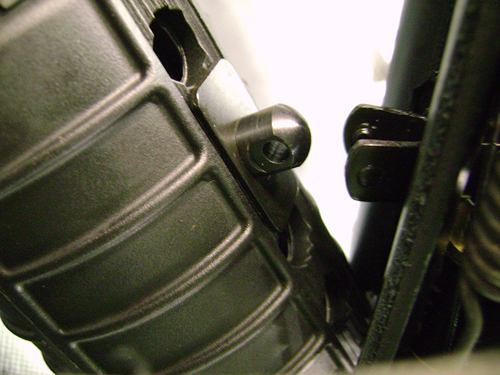
Place THE Harris #5 backing plate in handguard as shown with the screw hole lined up with the second vent hole in the handguard.

Screw bipod stud into the backing plate and tighten down as shown. Just tighten until snug. Do not over tighten as you may crack the handguard.

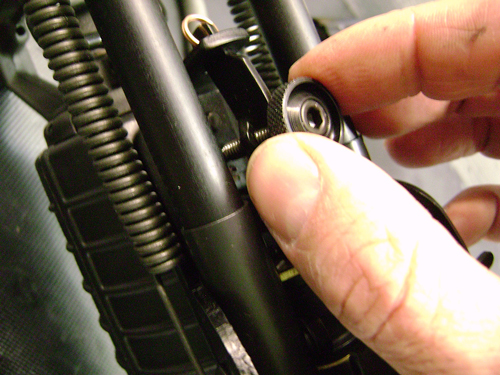
Unscrew the knurled knob on the bipod until the bipod locking tabs can be pushed through and separated enough to go around the bipod stud.

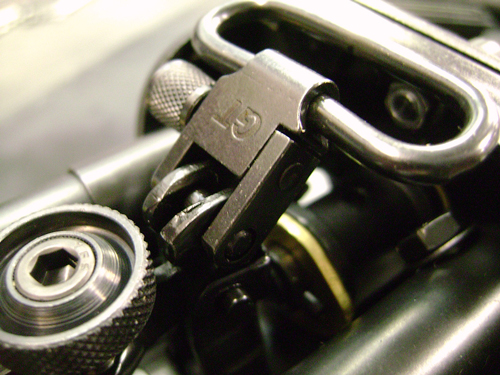
Tighten knurled knob on the bipod. The legs of the bipod should be pointed in the forward direction towards the muzzle.

Install the sling swivel provided with the Harris #5 on the bipod as shown.

0
YOUR CART
0
Your cart is emptyRETURN TO SHOP