Day: December 28, 2016

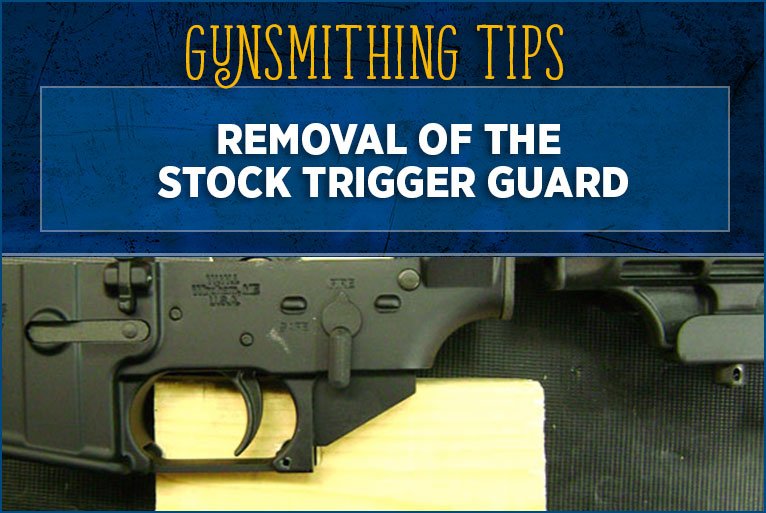
Removal of the Stock Trigger Guard

Make sure weapon is unloaded!  Wear safety glasses!

For those wishing to replace the stock trigger guard with an aftermarket trigger guard, here are instructions for removal of the stock triggerguard without damaging the lower receiver.

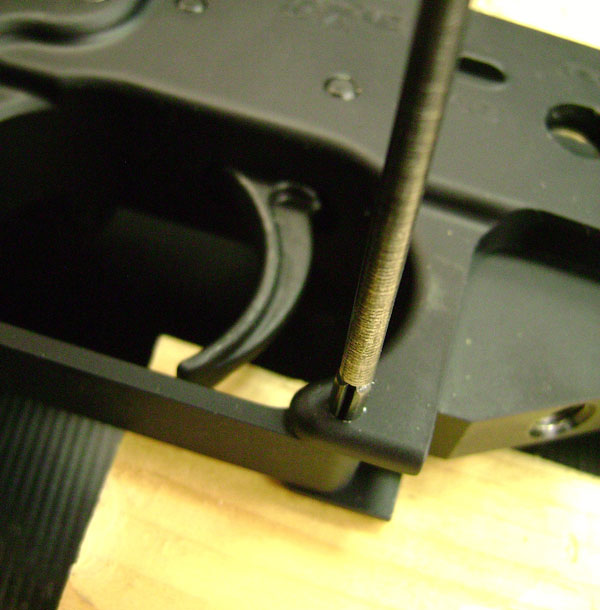
Removal of trigger guard roll pin must be done with careful support of the trigger guard ear. If you fail to do this the trigger guard ear will break off and is not repairable.

Here I have simply removed and replaced the stock trigger guard. Most aftermarket trigger guards are installed the same way but follow the instructions that come with whatever replacement you want to install.

Remove upper receiver from lower receiver by pushing in the rear takedown pin and front pivot pin.
Remove Pistol grip with a 3/16″ Allen wrench. Be careful not to lose the safety detent spring or safety detent.
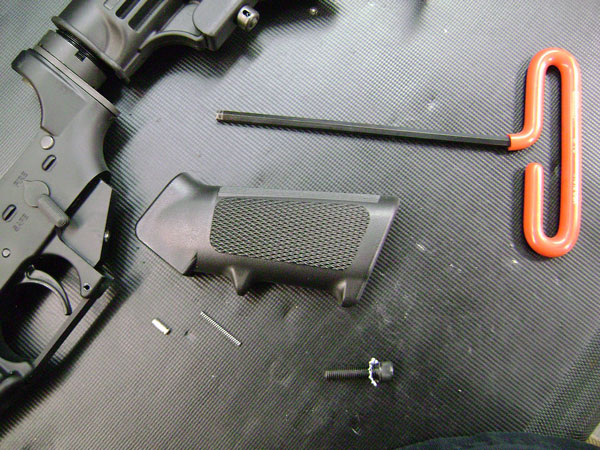

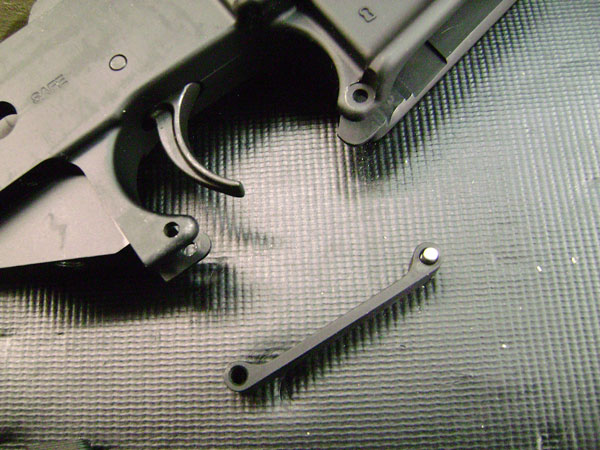
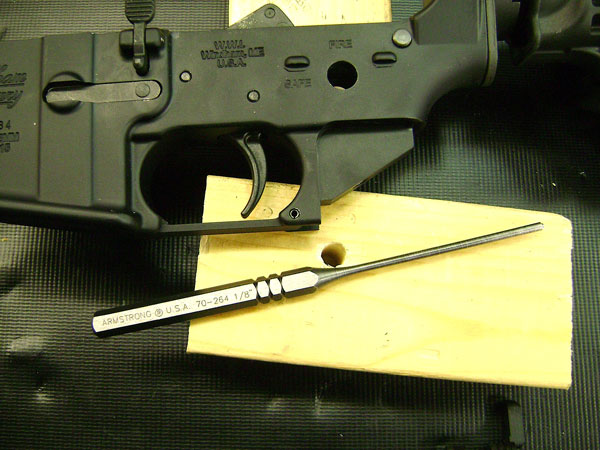
Cut two small blocks of wood that are about 1″ thick and drill a hole in one of them. Position them as shown.
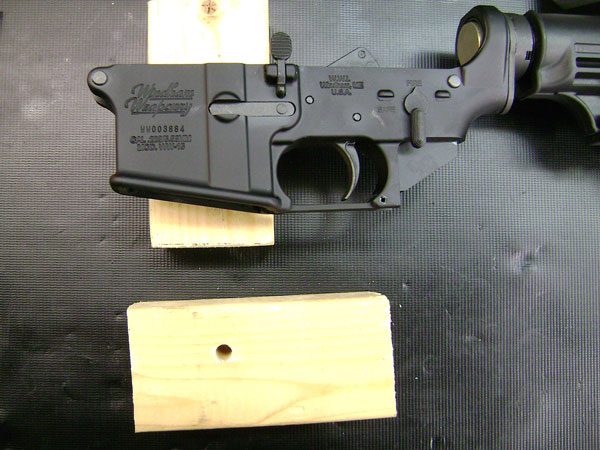
Place lower on the two blocks with the trigger guard roll pin over the hole in the block of wood as shown. Use pistol grip for support under the stock.
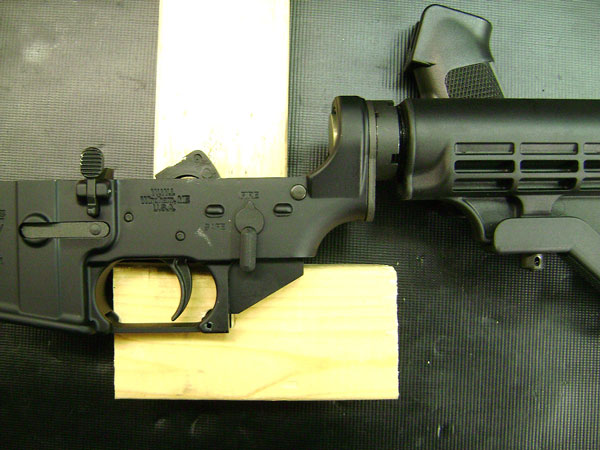
With a 1/8″ roll pin punch and a hammer slowly and carefully drive the roll pin out through the ears. Be sure to keep the punch nice and straight. Push it all the way out and into the hole in the block of wood.
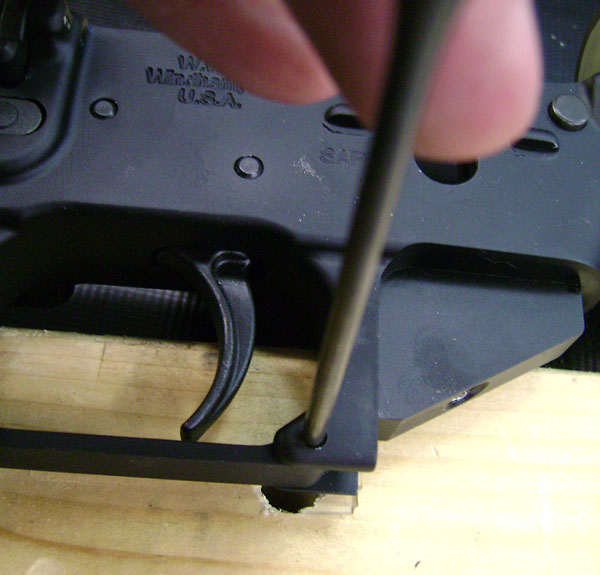
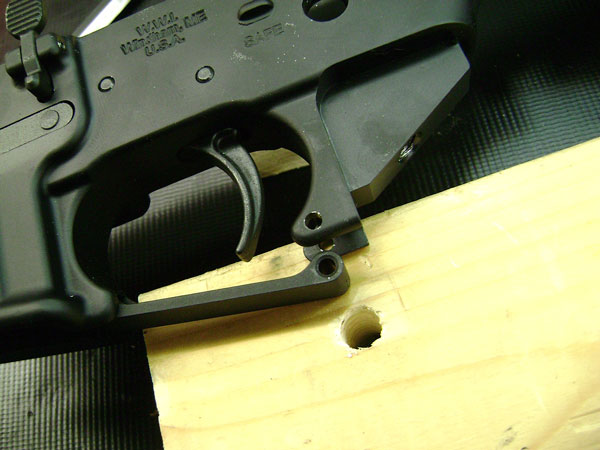
Use the punch to push in the detent in the hole on the magwell side of the trigger guard and remove trigger guard. 
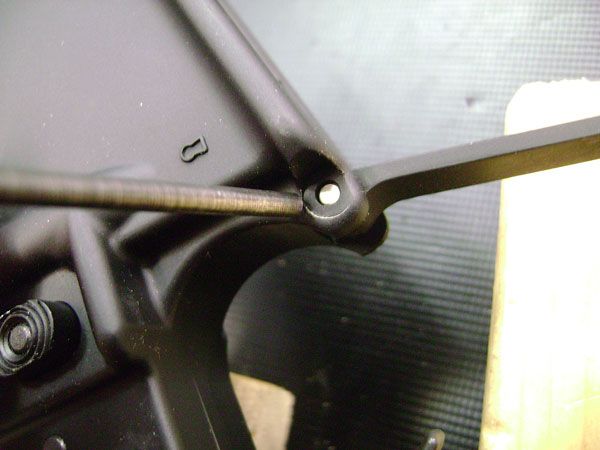

To reinstall, push detent in and replace in the magwell side trigger guard ear. Then replace the roll pin in the rear trigger guard ear.  It’s best to use a roll pin holder that holds a .130″ roll pin to start the roll pin into the hole. Be sure to keep the hole in the trigger guard lined up with the hole in the trigger guard ear.
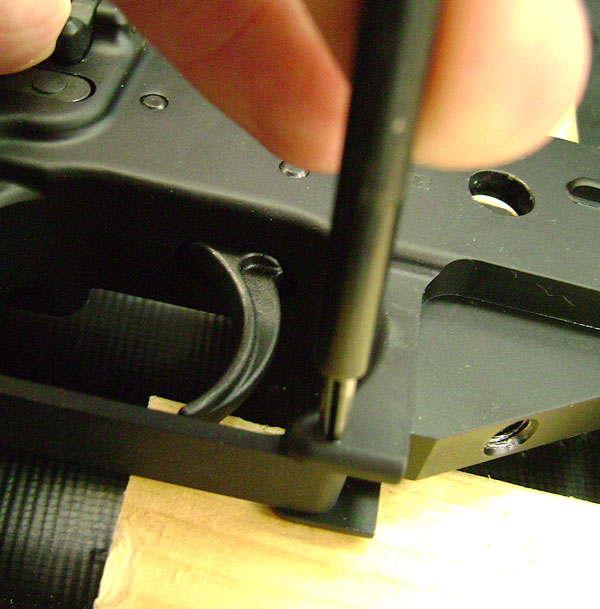
With the 1/8″ punch slowly drive the roll pin in until it is flush with the outside of the trigger guard ear.
Replace pistol grip in reverse order of removal.
Removal & Reinstallation of the Rear Sight Aperture

For people who want to change out the rear aperture in their A4 carry handle, I have outlined here how to properly do so. Some people like to replace the rear aperture with a tritium night sight for low light shooting conditions. In these instructions I have simply taken apart and reinstalled the stock aperture, but the directions are the same when reinstalling a tritium night sight.

Make sure weapon is unloaded. Wear safety glasses.

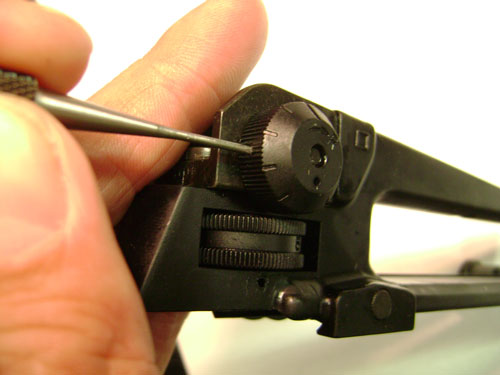
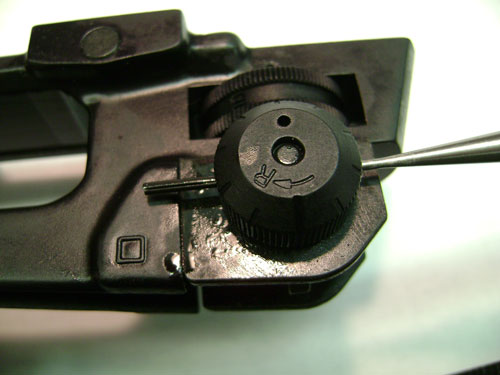
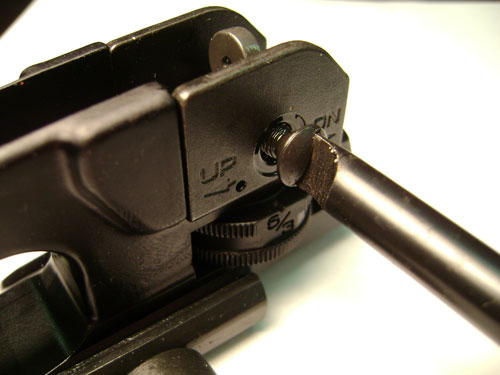
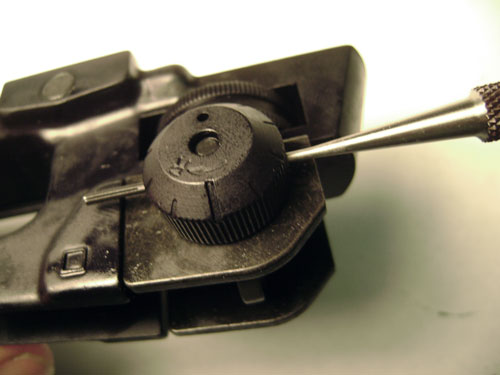
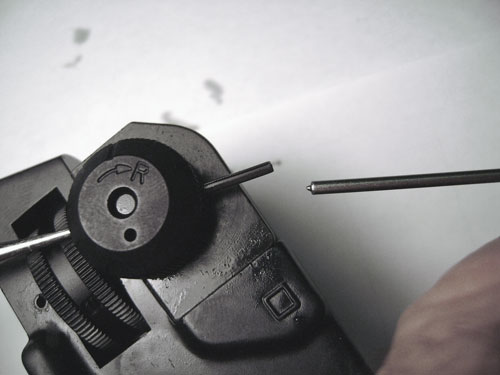
Remove carry handle from upper receiver. With a small hammer and a 1/16″ punch, drive spring pin out about 3/8″.


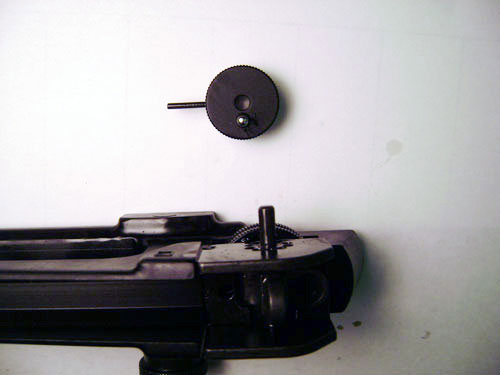
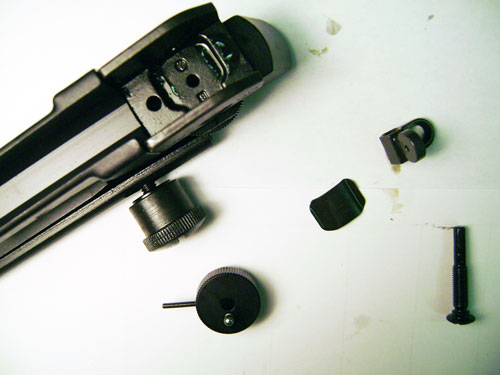
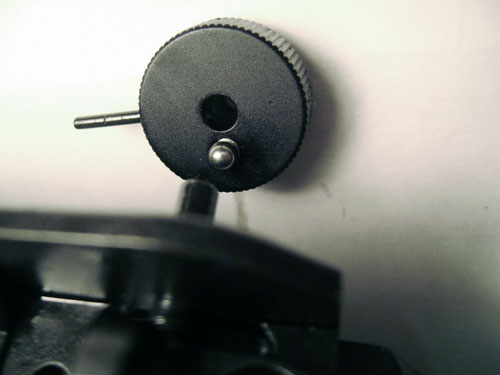
Pull out the punch while holding the knob and slowly pull the knob off being careful not to lose the ball bearing and spring in the knob. It’s best to hold the assembly so the knob is facing down and pull the carry handle away from the knob. Then gravity will keep the spring from falling out of the knob. The ball bearing itself may be stuck to the base with oil. Place ball bearing on top of spring and set the knob aside.


Unscrew the aperture screw and pull it out of the aperture and sight base.
You may now remove the rest of the parts.


Reassembly
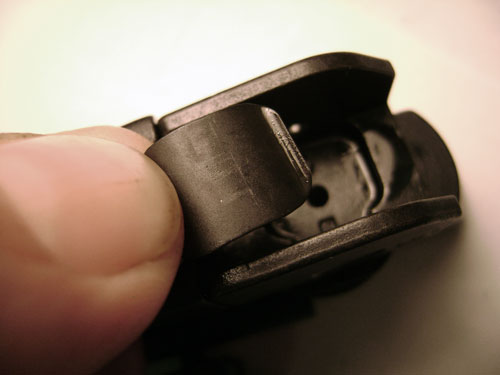
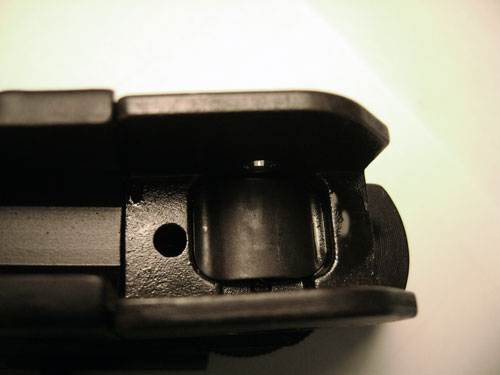
Install the flat spring as shown into rear sight base.


Place aperture on top of flat spring as shown and push aperture screw in through the base and the aperture.


With a plastic mallet tap the top of the aperture while pushing on the screw until it enters the hole in the other side of the base.


Screw aperture screw in lining up the index mark on the aperture with the middle index mark on the base as shown.

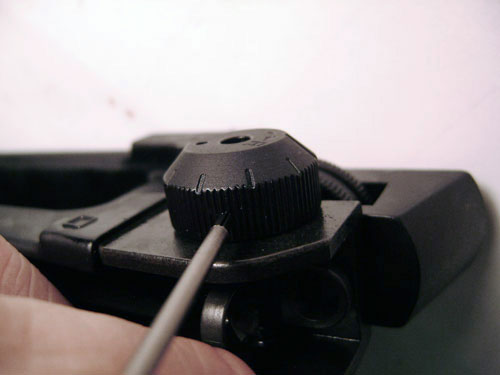
Place windage knob back on the aperture screw. Push the knob on lining up the spring pin hole with the hole in the screw. Push 1/16″ punch back through the hole in the knob and the screw to hold the assembly together.


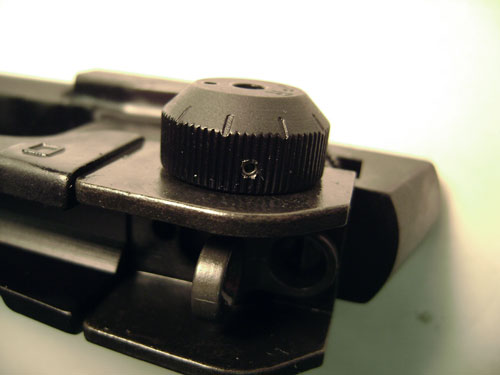
With a 5/64″ (No. 2) pilot punch, tap spring pin back into the windage knob.

Re-center the windage knob and you are finished.

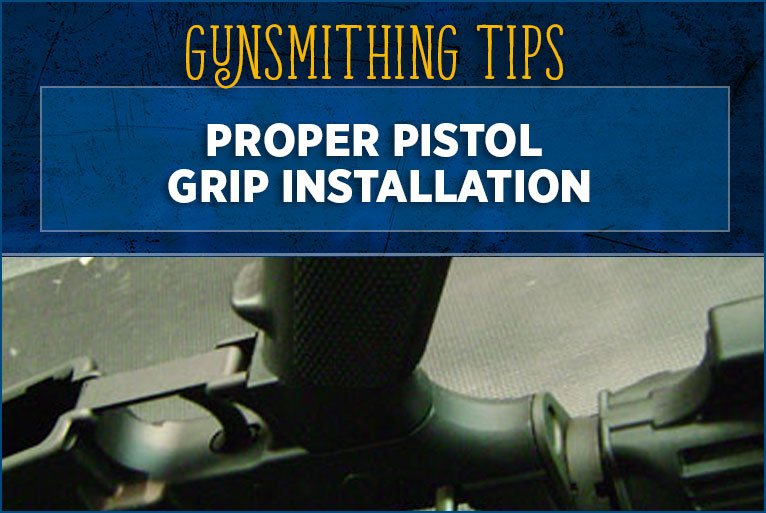
Proper Pistol Grip Installation

I know for many this seems like a pretty easy task, and it is, but I wanted to run through it because of a common mistake people make. I have seen this dozens of times in my years of working on AR15s. Someone sends a rifle in and the action is locked up solid.  It won’t fire and nothing moves. Then I take the hammer and trigger out of the lower and see this:

What you are looking at is the top part of the pistol grip screw hole where it comes through the bottom of the inside of the receiver. The crumpled up spring is the safety detent spring.

What happens is someone buys an aftermarket pistol grip and removes the stock pistol grip to install it, and the safety detent spring falls out.  Sometimes the safety detent is also lost. They assume the spring must have fallen out of the screw hole so they put the screw in the hole and screw the new pistol grip on. Then they find the safety flops around and the action is locked up.

So here is the proper way to disassemble and reassemble a pistol grip:
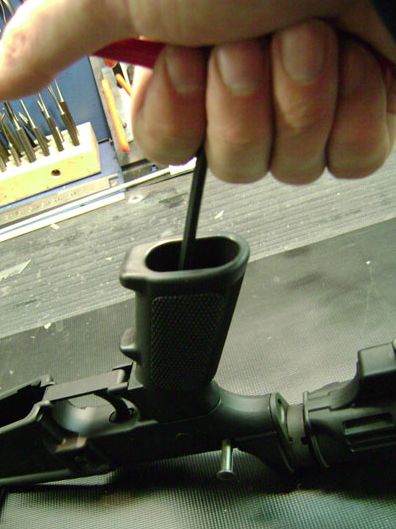
With a 3/16″ T handle Allen wrench remove pistol grip screw and washer.

Keep receiver upside down on a table as shown as you remove the pistol grip.
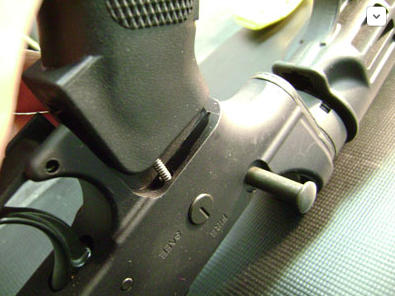
Note above the safety detent spring and its proper placement in the safety detent hole.
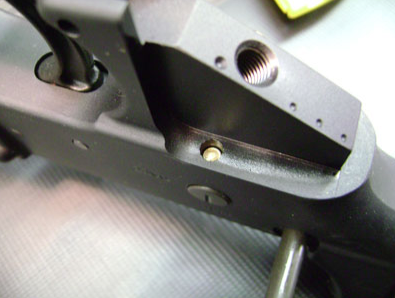
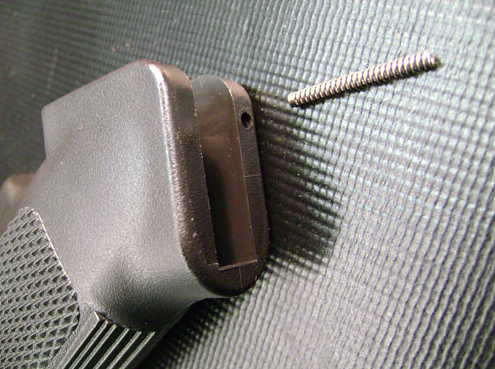
Remove pistol grip. Note the gold safety detent in the hole. This is why it’s best to keep the receiver upside down so this does not fall out. 

This is the hole in the pistol grip where the safety detent spring goes.

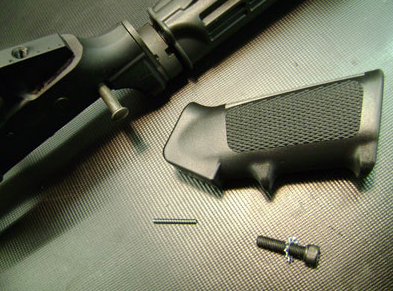
And here are all the parts.

Sometimes the pistol grip washer is stuck up inside the pistol grip. If it is just poke it out through the top of the screw hole in the pistol grip. If the replacement grip does not come with its own screw, use the factory screw for installation of the new pistol grip. If it comes with its own screw be sure to use the screw that comes with it. Some grips have a different thickness inside and may require a longer or shorter screw than the stock screw. Also some pistol grip screws use a slotted screw instead of an Allen screw so a screwdriver is required for reinstallation. Reinstall the grip in the reverse order above. When you put the safety detent spring in its proper holes press the grip down and hold it on. This will line the screw up at the proper angle for reinstallation and you will not cross thread the screw.

Inside the WW-15

The vast majority of AR15 shooters have a good idea about how the weapons work, but for those of you that might like a clearer view, here’s a look inside with some explanations of what goes on.

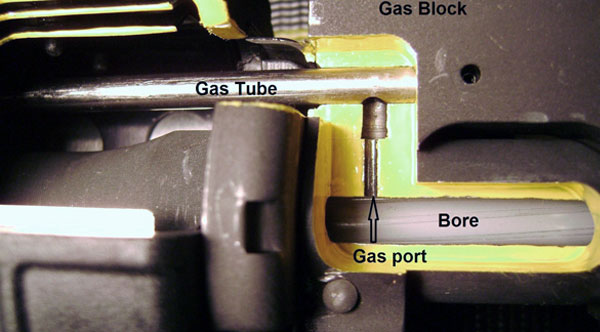
First here is the gas port coming out of the barrel and into the gas block. When a round is fired and the bullet passes the port, the hot gasses enter the port and then into the gas tube.

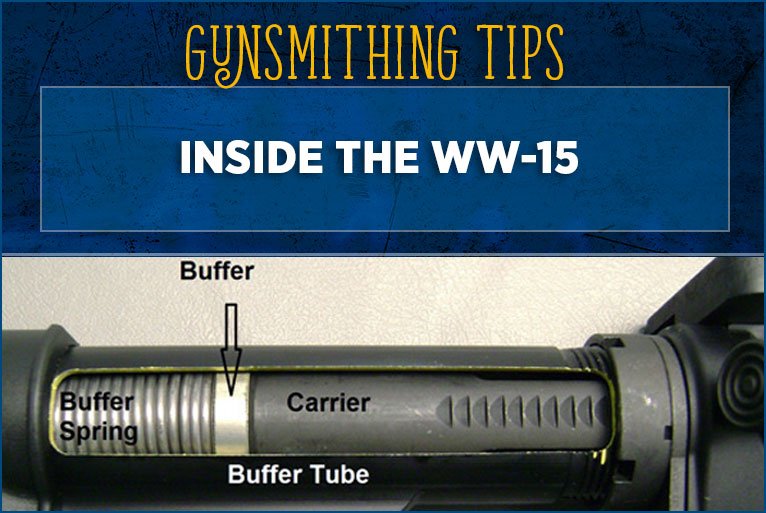
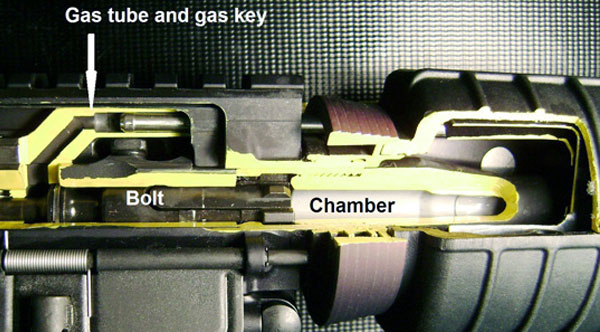
The hot gasses travel down the gas tube entering the gas key on top of the bolt carrier. Through a port in the carrier, the gasses blow into the area at the back of the bolt itself. This forces the carrier backwards away from the bolt. As the carrier moves backwards the cam pin that goes into the bolt through it, slides in a notch that forces the bolt to rotate. This rotates and unlocks the bolt after the pressure of the fired round has dropped with the bullet exiting the bore. This allows the carrier to continue its backward motion to the rear stopping when it goes as far back as it can against the buffer and spring. The empty case is simultaneously extracted and ejected from the gun and the carrier moves back forward under tension of the buffer spring, stripping a fresh round from the magazine and chambering it into battery.

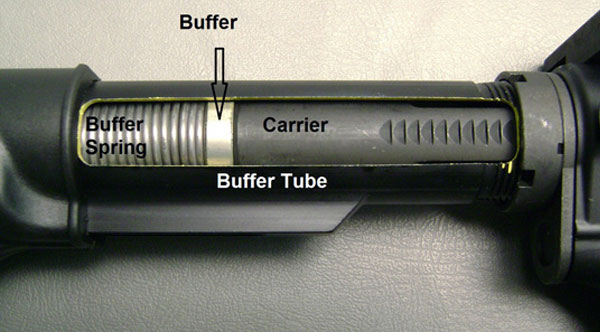
This photo shows the carrier compressing the buffer and spring all the way to the rear.

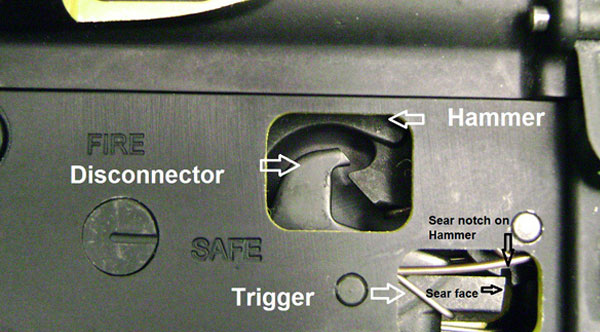
Inside the receiver, this photo shows what the hammer and trigger positions look like when the bolt is locked to the rear. When the gun is fired and the hammer comes back, the disconnector engages the hook on the back of the hammer holding it back. When the trigger is released it drops off of the disconnector and stops on the sear which is on the trigger at the sear notch in the hammer. This makes it so the gun can only be fired one shot at a time or in “semi-auto” only.

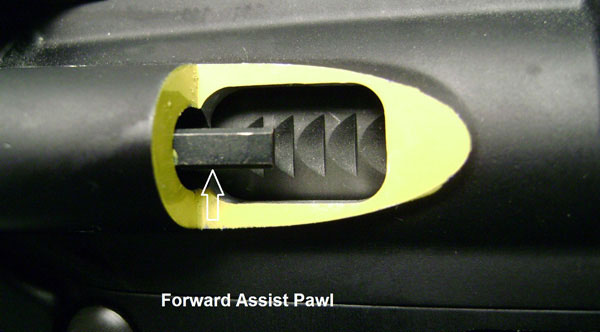
And this is where the forward assist pawl engages the notches in the bolt carrier assembly. If the weapon does not go fully into battery when chambering a round, pushing the forward assist helps the carrier forward to send the bolt all the way into battery.

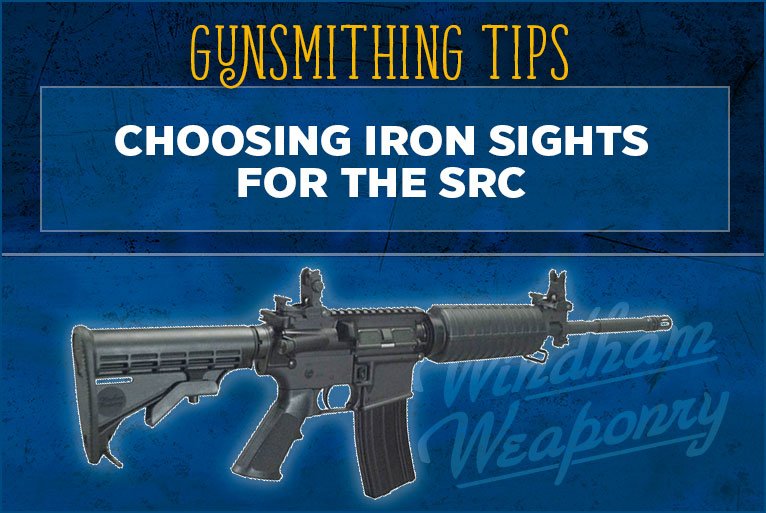
Choosing Iron Sights for the SRC

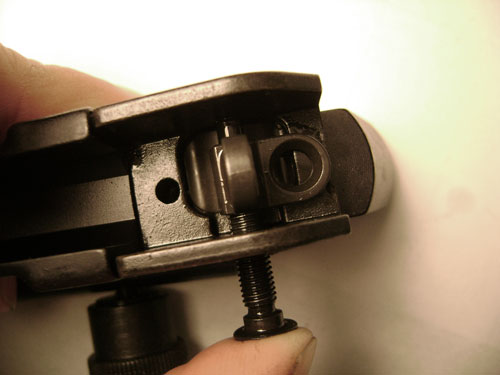
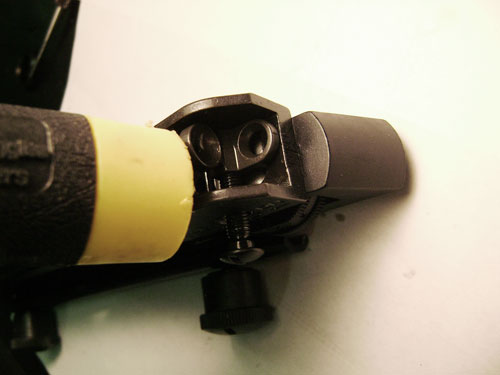
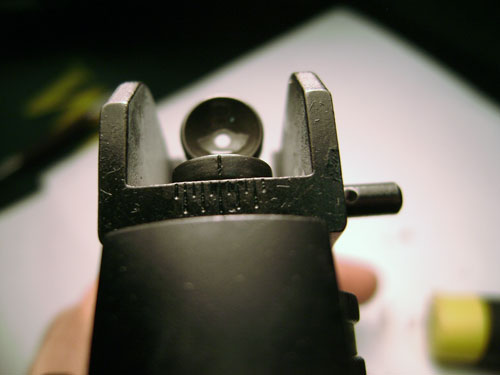
When choosing iron sights for the SRC rifles, it is important to make sure you get the correct height front sight. Most manufacturers of rail mounted iron sights make two different heights for the front sight. With the SRC (and VEX rifles) you have to make sure you get a front sight that is for “same plane” sighting. In other words it has to be the same height as the rear sight that is mounted to the picatinny rail on the upper. Some confusion comes in here when you see a company that offers a “Gas block height detachable front sight”.

Right now we are one of the only manufacturers that make an AR15 in which the picatinny rail on the gas block is on the same plane as the upper receiver. Most company’s gas blocks have rails that are lower than the rail on the upper. Front sights for these rifles have to be made taller to make up this difference in height. So what happens if you mount one of these taller front sights on an SRC is your rifle will end up shooting way too low and you cannot move the front sight post down far enough to get the gun on target.

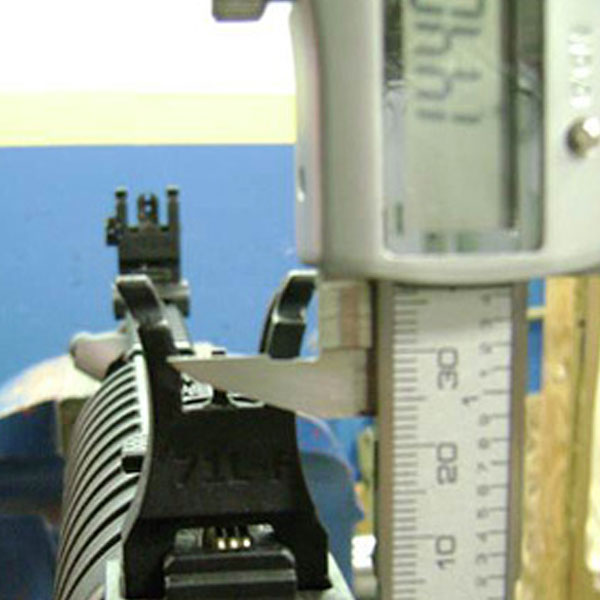
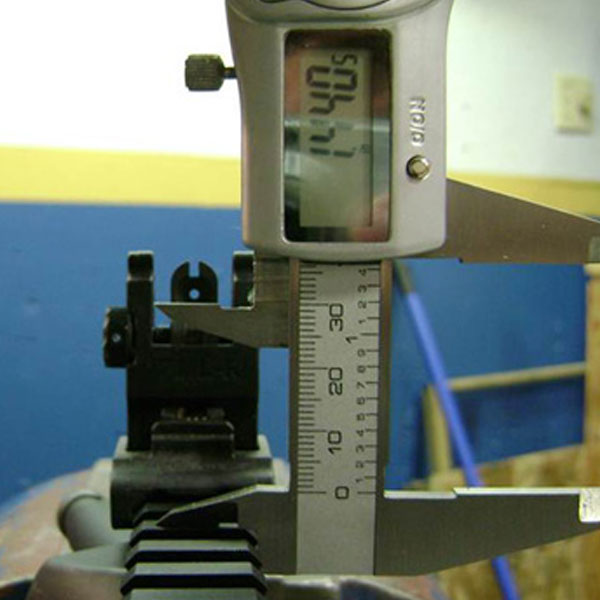
Below is approximately what the measurement is supposed to be for the front and rear sights. Note that is has to be the same or at least close to this measurement for both sights.

Rear sight, approximately 1.440″ from top of rail to aperture: 


Front sight, approximately 1.440″ from top of rail to top of front sight post:

0
YOUR CART
0
Your cart is emptyRETURN TO SHOP